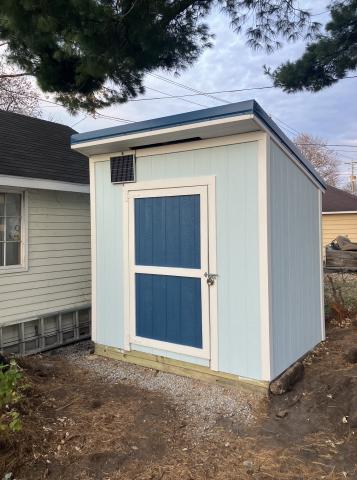
As someone with too many hobbies and tools and projects, it's no surprise that space is my main limiting factor around the house and shop. It's probably for the best that space limitations help to moderate my project acquisition. Still, the garage is hitting maximum density, and I'd love to have a place to keep some of the things that I don't need to keep handy, like the extra set of car tires, and seasonal things like the mower and lawn furniture.
Enter the storage shed project.
I researched shed options, and pretty quickly decided to design my own. I didn't want to get a plastic shed, the metal sheds seem a bit fragile and damage-prone, and the wooden shed options were all about double what I was hoping to spend. I also wanted something around 8'x6', which is an odd size, but seemed like a good fit in the space with more than enough room for what we knew we wanted to store.
The design was done by mid-summer but I procrastinated ordering materials until September, then with lead time and foul early fall weather didn't get started building until mid October.
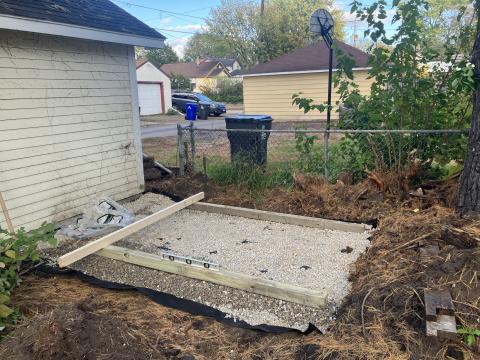
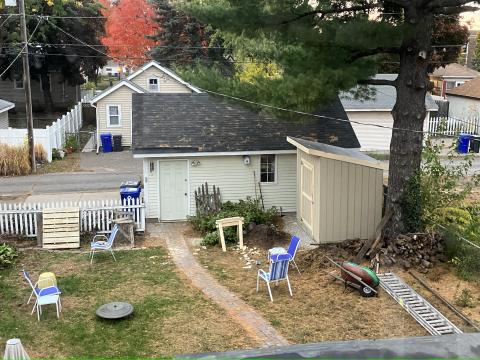
The shed is located between the garage and a large pine tree, a corner of the yard where I've been piling trimmed branches and keeping the compost pile, and it's been a mess anyway. This is a much better use of the space.
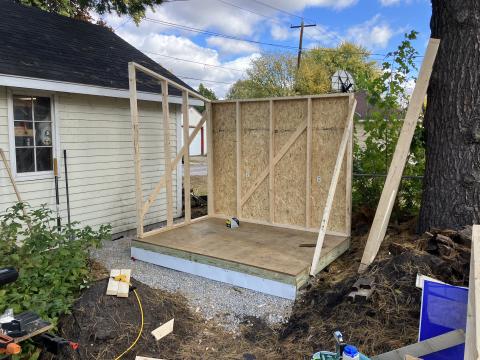
The foundation is gravel over leveled dirt, then 4x4 treated skids and 2x6 joists. Probably overkill. We hit a nice patch of weather and got from level foundation to fully framed in, with roof sheathing, over a weekend. I started Friday afternoon and got the base built and a start on the back panel, then continued early Saturday morning.
I used a lean-to style roof to maximize ceiling height with the small footprint and simplify the roof, though it's far easier to find design references online for standard peaked roofs than for a lean-to.
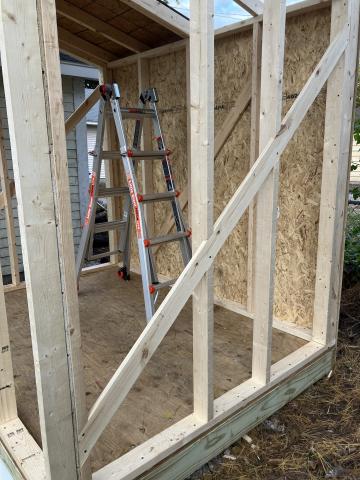
Framing is standard 2x4, though I included a diagonal brace on each of the side and back walls. Again, probably overkill, but I hadn't used these siding panels before and wanted some backup to them for racking strength.
The diagonals are mortised into the framing, and despite the extra work it does really help keep these frame panels together when setting them into place. I'm working by myself for pretty much the whole project, so it's helpful to not need 3 hands for everything. It's cool when the parts you're making all start to fit together like they did on the plan drawing.
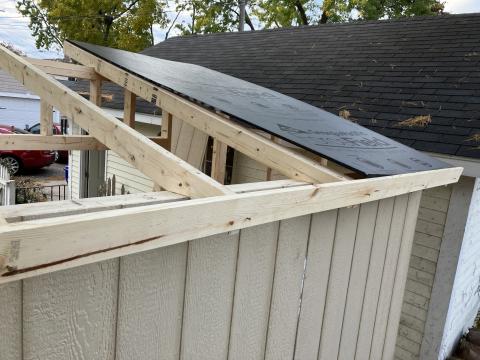
An example of making my own third hand here, setting up a backing board to keep the roof sheathing from sliding right off so I can position and nail it in place. I'm planning to use a metal roof, but those pieces are coming in separately so I wanted something that would be weather tight in case I couldn't get the metal installed before spring. These panels are supposed to be good for 6 months of exposure in the rain, so should be more than good enough.
As much as possible I tried to design for few cuts in the large panels, so these are 2 sheets of 4x8 that go on as-is.
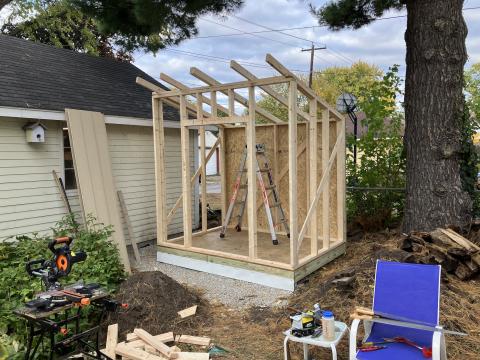
I ended that Saturday with a fully framed-in shed, plus installed roof panels. The reinforcing boards added some time, but so did the side walls, with the roof angles to cut. My only tool splurge for the project was a power miter saw, and it was incredibly useful, a real time-saver. On the other hand, I did not use a power nailer. I hit all 7 pounds of nails with my own hammer.
A look at the confluence of joint angles at the top right corner, before it gets covered up in sheathing.
The progress on day 2 (Sunday) doesn't seem nearly as dramatic, but it involved a lot of fiddly cuts and I seem to remember a couple of trips to the store for things. I think I ran out of nails at one point. Anyway, Sunday evening, and it's a weather-tight building except for the door opening, which felt really good.
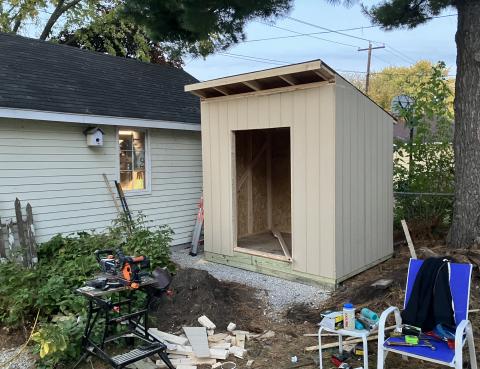
Monday afternoon I built the door from the cutout pieces of siding, plus an inner layer from the OSB panel that was used as packaging for the siding panels. I was pleased when the vertical lines in the door panel aligned with the rest of the shed front. I was aiming for that, but that kind of thing never seems to work out so nicely.
An overview of the shed in place.
At this point we hit several days of bad weather, with snow flurries and a bit of rain, so I was happy that it was an enclosed usable space. Even if it wasn't done, I could store things like the saw and wood and the ladder. It was already paying off!
The roof panels kept getting pushed out, and ended up arriving 2 weeks late, and at that point it was solidly around freezing for the daily highs. I had resigned myself to installing the roof in the spring, but after tiptoeing around the panels in the garage for a few days and realizing what a hassle it was going to be to store them over winter I decided to just add the roof.
There are no photos of the roofing work. One, the main panels went up really fast after the first one was aligned. The roof only needed 3 panels, and it's really just screwing a fancy metal sheet to a piece of wood.
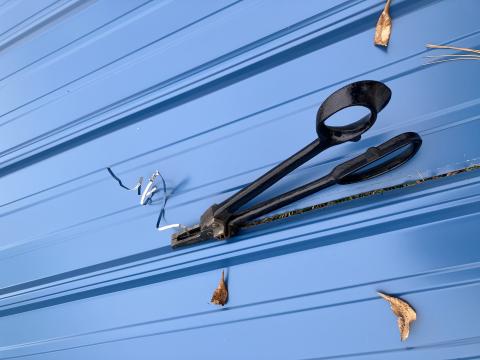
Oh, except it really needed like 2.75 panels, so I had to trim one of them short. I was really at a loss for how best to cut about 16" off of a long side until I remember these funky metal shears I got at an estate sale last year.
They were actually the perfect tool for the job. These are designed to cut a strip between two side anvils, so you can make long cuts in sheet metal without distorting the edge like you'd have to with aviation shears. There are electric versions of these available, but I'm glad I didn't have to buy them for just one cut.
Oh, and the roof is blue. I don't hold up my roof trim work as an example, you'd be better off asking the lumber yard about it. Mine turned out fine, but not amazing.
Happy to have the roof installed, I was still resigned to painting the shed in the spring when we got a surprise few days of highs around 60°F, so we got some paint and I got it done over a couple of days.
The black panel is solar, to charge the interior lights. I didn't want to mess with connecting the shed to garage power, because it's just for storage, but also wanted to see what's in there since I didn't want to add windows. A couple of LED strips, a 12v battery, and cheap charge controller all work together to (hopefully) have light inside whenever we need it. In testing I could get at least 2 hours of use in relatively cold weather and still see some charge on the battery indicator. The panel doesn't get full sun, but it also gets so little use that it should be fine.
I'm really happy to have this done before winter. It's mostly tires and scrap wood inside, but what a difference in the garage space, and I'm sure I'll reconfigure it next year as we have more time and find more uses for that space.

