I've been noodling with audio circuits since finishing my amp project last year. I mostly played with some different kinds of fuzz on a breadboard, then built a small fuzz box with mostly parts from Ax-Man.
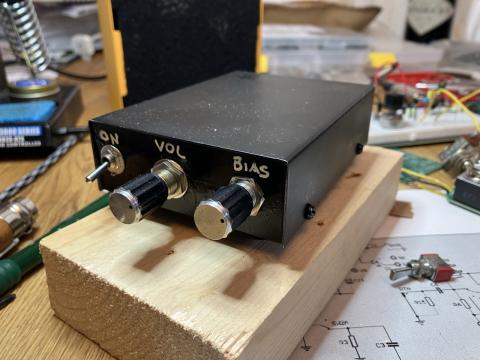
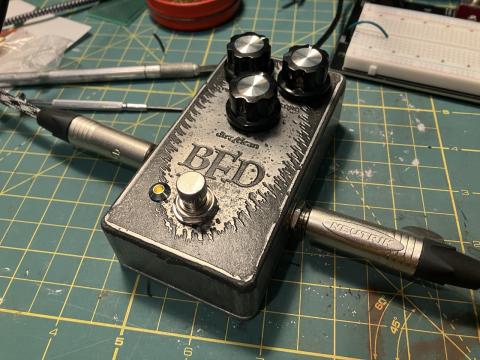
There's no foot switch, just an on/off toggle and controls for the output volume and bias. The bias control changes the voltage on the transistor and hence the tone it creates, from a strong fuzz to glitchy and broken up.
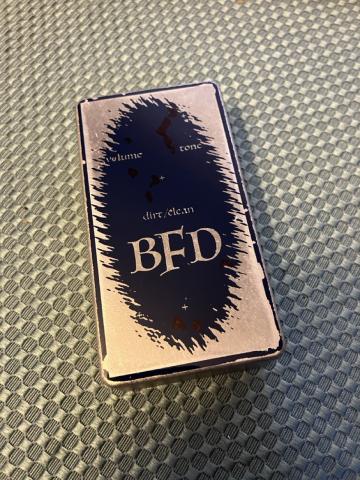
For a first proper pedal box build, i thought i'd make another version of the bass distortion that i built from a kit last year. I like that pedal, but the blend function doesn't work smoothly for some reason that i haven't been able to figure out yet. So until i have the skills to dig into that further, i thought i'd try something new.
The main circuit is really just an Electra distortion with an added LPB-1 boost added after.
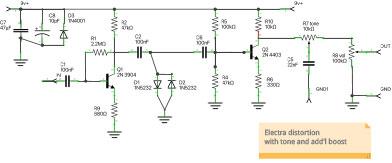
I wanted to build a distortion circuit that would work directly with the Guitar PCB Buff 'n Blend Board to mix the clean and distorted signals together to give a deeper sound on bass. The blending needs to have both signals in phase to work properly. Since a single transistor circuit inverts the signal, I added the LPB-1 boost circuit to hopefully get the signal back in phase (inverted twice).
The transistors and diodes are from Ax-Man, my local surplus store, and i basically just tried a few different options for both (with variants in bias) until i got something that sounded good to me. Ax-Man has a suprisingly great array of electronic parts, but the more popular parts are long gone, so you end up trying a few alternates and seeing what happens.
With the circuit working well on the breadboard, i started planning the case. I had a small box that should just barely fit it all, but it was hard to tell with an undrilled box. I created a design and layout with small crosses where i'd drill holes in the top.
While researching designs I saw some really cool etching and thought i'd give that a try. I used the blue press 'n peel film and my laser printer, using an old travel iron to transfer the toner. It went well aside from the border, but i knew i'd want a sort of broken, decayed look, so i left that as is.
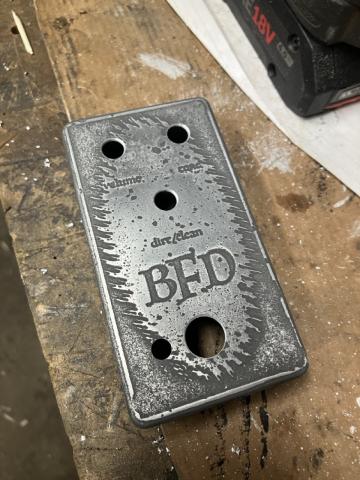
This is the box after drilling. I'm really pleased with how the etching came out. It was in the acid bath a couple of minutes too long, the toner was coming off and the lettering for the top 2 labels is not very legible, but the effect is just what i wanted.
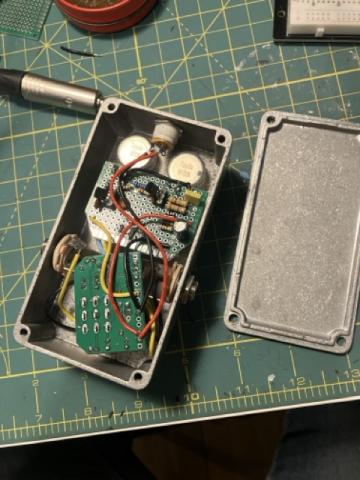
This is the inside circuits, wired up. The diagonal board at the bottom is the Buff 'n Blend, it works as an extended breakout board for the foot switch. It's off-kilter to give better access for the in/out jacks. I also had to bend the pots down, pulling the board higher to make room for everything. It's tight, but it fits with no interference or shorts.
Before assembly i gave the top a light coat of satin black paint and after it was dry I polished off the top with some fine sandpaper.
I did have it apart a few times after initial assembly because i thought it had a bad ground, it would hum every time i turned down the volume on the guitar or bass. Turns out that was actually some problem with the cable i built, not sure exactly why, but the pedal works perfectly with commercial cables, so i'm going to call it done.
This was a fun build, i learned a lot and already have a couple more in the works.