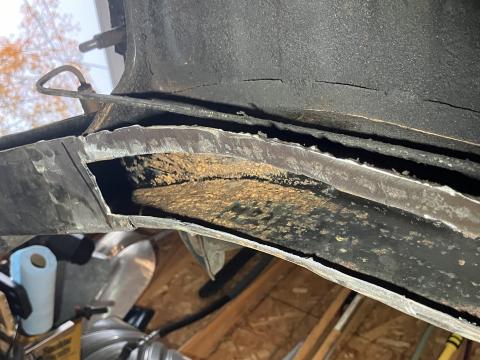
The last time i repaired the TR6 frame, i just focused on the repair in the front and cleaning up what i could reach. I could see some small holes on the trailing arm mount tubes, but the frame generally looked solid enough to not worry about it.
While getting ready for the Waumandee Time Trial (hill climb), i put the car up on a lift (thanks, Brandon) to do some maintenance and give everything a once-over. Those little holes in the frame had gotten noticeably larger.
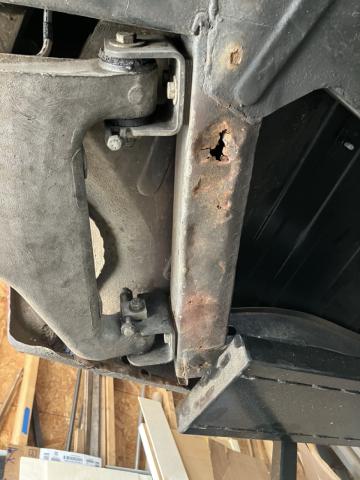
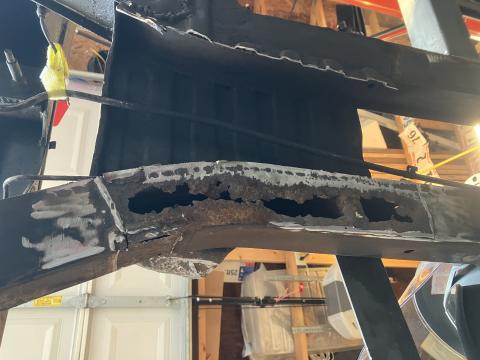
Not only was the hole larger, it was disturbingly easy to poke a screwdriver through a couple of other areas of that lower side. It was time for a proper fix. It's unlikely the trailing arm would rip out of the frame, but it would be a real bad time if it did.
These trailing arm mounts are a notorious weak spot on TR6 frames. They can collect water inside of the rails but don't drain properly, so over time rust sets in.
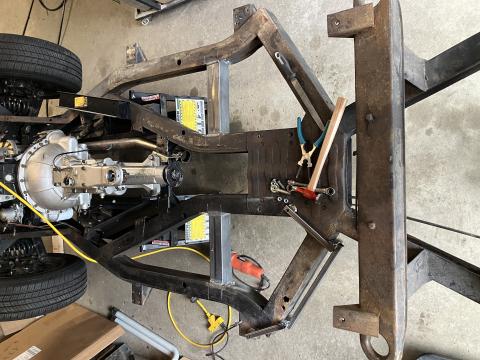
I scheduled a tech session with the Triumph club, and a dozen guys came over to help remove the body.
It's a drastic move, but the only way to do the repair right. It might even get me to start body work for a repaint. Later. Much later.
With the body off you could see frame rot on the top side too, that indicates some pretty advanced rust inside.
The repair for this is to replace that section of the frame with new metal. It's a common enough problem that repair sections are easily available from the major parts suppliers. Before i started cutting i made a jig to locate the trailing arm mount holes in relation to 2 body mounts in the frame. This should help ensure correct alignment, or at least as good as it came from the factory (which was not a precision operation).

I got the plan for the jig from Elin Yakov's Rusty Beauties YouTube channel where made a similar jig. It's welded from square bar bolted into the trailing arm mounts, so it's rigid and strong enough for repeated assembly/disassembly, which will be very handy when i get to fitting the new parts.
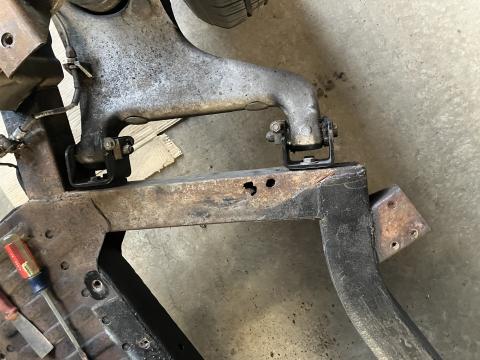
Before cutting out the bad sections, i welded in an additional tube from the center tunnel to the outer rail on each side. This replicates an addition that Rat-Co has on their new TR6 frame replacements, and should hopefully add some stiffness to the frame.
I used 2.25" square 14ga steel tube. It's a good fit within the inner flanges of the frame rail, and just a bit heavier than that original frame steel. I added a hole on the bottom of each for a vent while welding, then access for internal paint coating and a drain afterward.
I used a sawzall to cut out the rail section and then the angle grinder to cut apart the welds at the end junctions to peel apart the overlapping pieces.
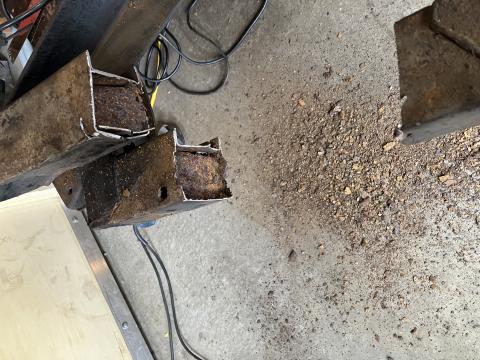
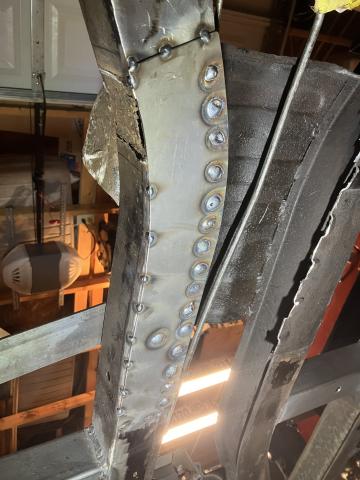
You can see the inside of the removed section and how rusty it is. Those inside plates are baffles to reinforce where the mounting bolts go through. These are not providing much support. Another rusty area is under the lower reinforcement place, known as the t-shirt area.
With the plate removed, you can see the rust through the bottom side of the frame rail, with rust through at the trailing arm mount junction. The inside top and sides of that rail are surprisingly clean, showing some original paint.
I cleaned up the inside surface rust and sprayed in some rust converter. I generally cleaned out the rail interior everywhere i had access, to scrape and blow out any loose rust or dirt.
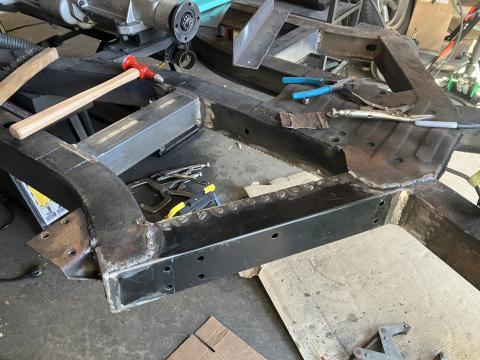
New bottom section tacked on, and then fully welded and ground smooth. The side patch is for the junction, oversize so the new section welds to new metal. All of the new metal is 14ga steel. I started the project cutting everything with an angle grinder and cutting disk, but later got an electric shear that's much nicer and quieter to use.
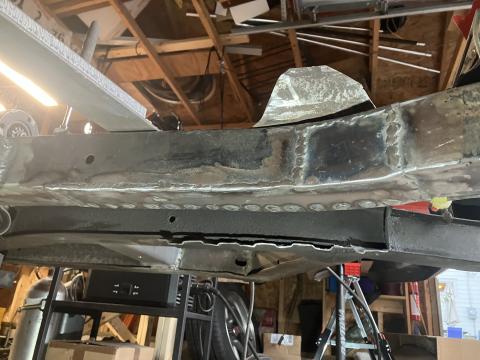
You can see the upper t-shirt peeled back. I didn't find anything worse than surface rust there, so i cleaned up and converted rust for everything i could get to but otherwise left it in place. That flap gets welded over the cross section once it's welded in, replicating the original setup. The bottom plate is similar, i'll be installing an all new one.
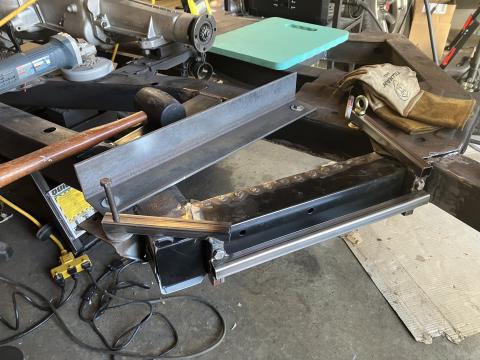
Fitting in the new frame section. It comes in 2 pieces, a large deep section and shallow inner section. I drilled out holes and plug welded the sections together after initial fit. The jig helped to keep the mount holes aligned, and doubles as a nice handle to move the section around during fitting.
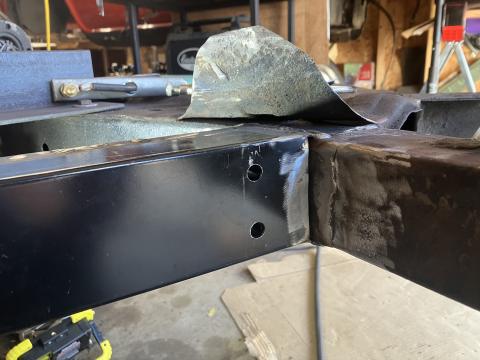
The inner rail ended up tight on one side with a small gap on the other side, when it fit correctly on the jig. I trimmed the acute side just enough to fit correctly and filled in the gap with a narrow strip for a solid connection. The outer rail connection took a fair amount of trimming and fitting to get the alignment right too, plus some new metal to replace some thin or missing areas.
This was all for the driver side, that whole process repeated on the other side. The passenger side wasn't nearly as rusty but it got all the same repairs and new metal as the driver side. As long as i'm already elbow-deep, might as well make both sides equal. Apparently i didn't get a photo of installing the new lower t-shirt plate.
I also gave the frame a good inspection for any other repairs. I didn't remove the engine or front suspension, so i couldn't easily flip the frame, but everything from the gearbox back was stripped off. I found a small crack in a weld at the steering box mount in front, the exhaust mount had broken off at the rear crossmember, and cracks around one of the front differential pins, showing that repair was certainly done with the body on.
(crack fix photo from after paint)
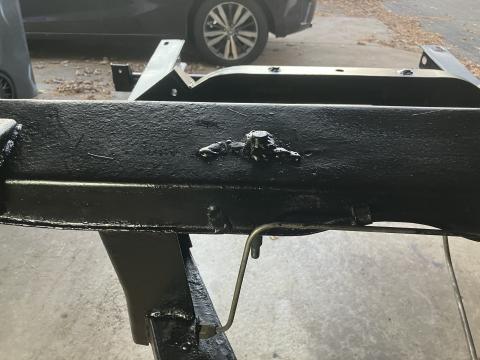
With the repairs done i did a thorough round of degreasing and sprayed in 2 cans of internal frame coating from Eastwood. It's thin, green paint that should also encapsulate any rust i couldn't otherwise reach. For the outside i brushed on 2 coats of Eastwood chassis black. It's also fairly thin, would probably be better to spray, but i didn't want that level of mess so i ended up each painting session with a completely black hand from the brush drips.
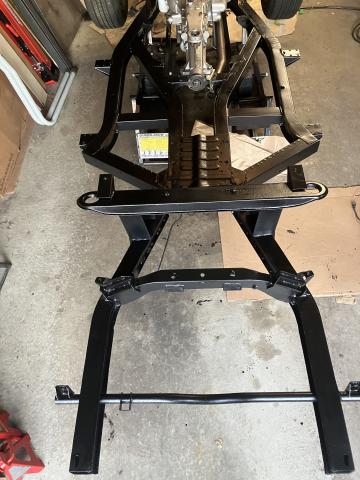
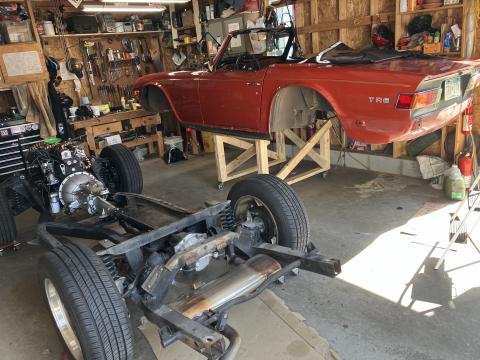
The finished frame looks great though, and the paint seems pretty durable. I let it dry a few days then started to reassemble, getting as far as a rolling chassis before the garage was too cold for more work.
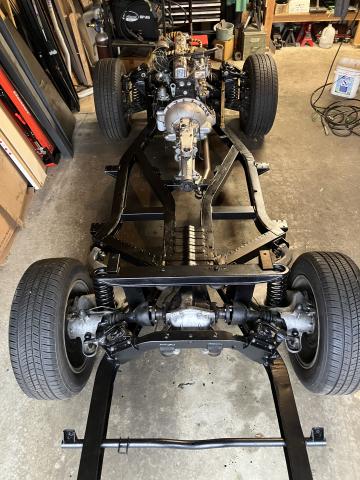
It's unfortunate to end the year with the car in multiple pieces and no way to get the Honda in the garage for the winter, but i'm really pleased with how solid the frame feels. With any luck this is the only time i'll have to pull the body off like this, and i'll have it back together in time for summer driving again.