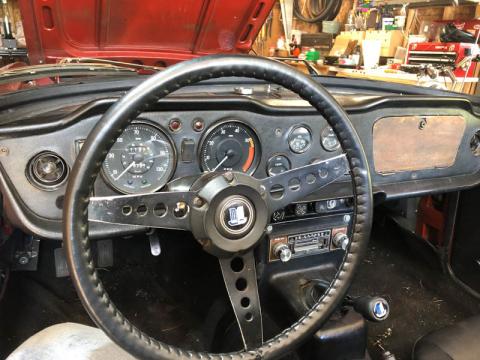
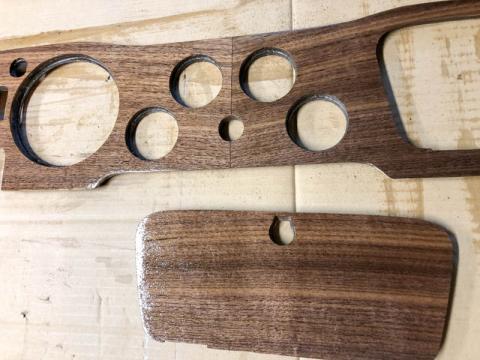
One of the cool things about the TR6, especially considering it was a fairly budget-oriented sports car, is that it came with a real wood dashboard like more upscale British cars, featuring a nice walnut veneer. They really put the board in dashboard.
When I got this TR6, however, the dash had been covered with black vinyl, presumably by the same previous owner who made their own seat covers and screwed all the carpet to the floor pans. It's really not a bad look, but the piece over the glove box had come unglued, it was coming loose around some of the gauges, and it seems a shame to not to have that nice wood dashboard again.
Refinishing the wood dash is not a trivial job, not so much from the woodworking perspective, but because it's a prime gateway for shipwright's disease, or the "while I'm in there..." rabbit hole. To remove the wood dash, you have to remove all of the gauges, the warning lights, the wiper and hazard switches, and various dash lights. You want to make sure all of that is in good shape before putting it back together, because it's a hassle to remove, label, and reinstall all of that. In my case, I was missing the washer switch entirely, the hazard switch was broken, the wiper switch was actually a light switch from a different year TR6, and the hazard/brake lights were missing pieces entirely, among other issues.
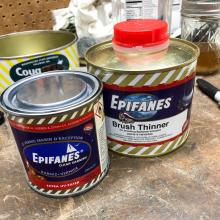
Happily, fixing and finishing the dash takes plenty of time, so there are many days available to tinker while you wait for varnish to dry. I'm using Epifanes marine varnish, since this is in many ways an outdoor project that will see its share of sun. It's fairly expensive, but a 250ml can is plenty for this project. The thinner is important to help the first step soak in and reduce brush strokes on the subsequent steps.
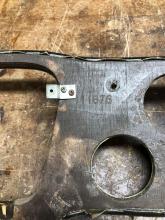
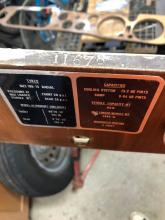
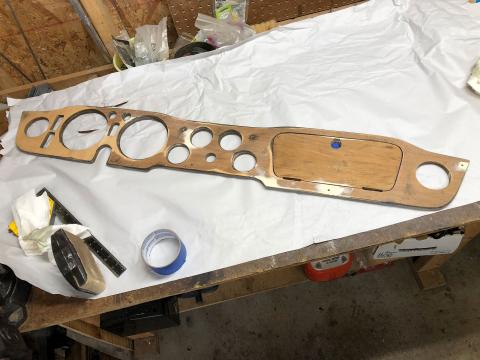
Day 1: remove dash, label all the things. Remove the vinyl and strip the existing glue/finish to see what we have. The dashboard is stamped with a serial number, presumably to make sure the dash and glove box stay together through the initial build, so the grain pattern matches.
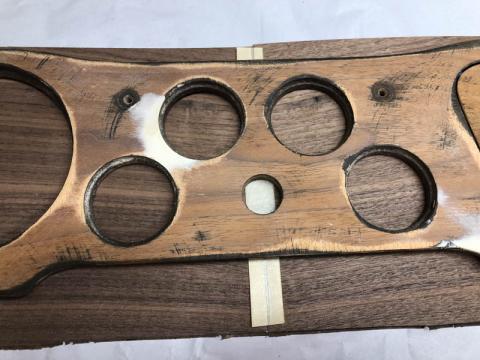
It appears that the previous owner must have used a belt sander or something to try to clean up the surface, because the surface is fairly rounded over on some edges, with lots of deep scratches. They likely thought the veneer was thicker than it is. There's also a fair amount of compression around the mounting holes. Here i'm starting to bring up the low spots with some wood filler.
Day 2: more wood filling, leveling low spots, general stabilization. There were some loose areas of original veneer at the driver's end, which makes me wonder if it had been water damaged. Overall it's pretty flat and stable though, worth fixing rather than replacing. There was some nice grain on there, too bad it's so beat up. I ordered the new veneer before taking this apart, so it's not a match for the original. Mine is quartersawn with more of a straight grain while the original was flat cut, more like a board.
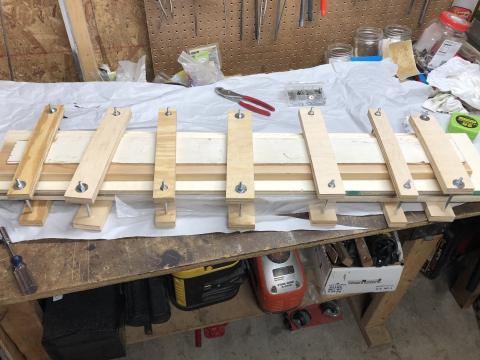
I laid out the veneer, did some test gluing on scrap and built a clamping setup for the final gluing. Even though I have plenty of veneer to finish the dashboard in a single piece, I decided to book match side to side, like was done on the earlier TR250 models. My original dash was not book matched, but since the veneer I got doesn't have a lot of grain variation this will help give it a bit more interest.
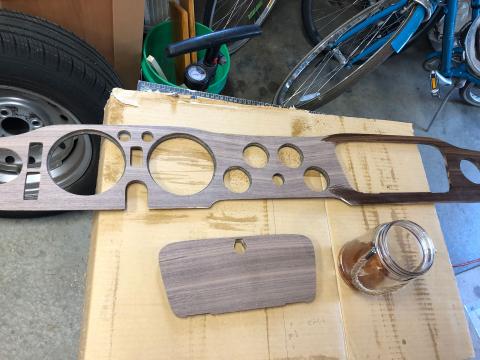
Day 3: final leveling and sanding, glue and veneer. It only clamps for an hour, then needs a few more hours of curing time. Trim veneer around all holes & edges with an xacto knife.
Day 4: more cleanup around the edges, and a bit more wood filler under some edges that weren't as flat as I thought. I don't want to have any unsupported veneer that could peel up in use. Clean up the small gauges, fix a crooked part on temp gauge, touch up paint on 2 bezels. First coat of varnish!
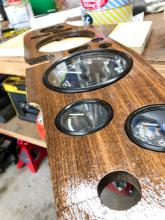
Days 5-15: another coat of varnish each day to about 10 coats, then wait for another week to let it more fully cure. The look after 5 coats:
Do other small jobs while I wait for each coat to dry, including:
- Assess options for broken hazard switch, missing wiper and washer switches. Order new switches.
- Replace remaining gauge lights with LED bulbs - I couldn't easily reach the oil and gas gauge lights when i did the initial set before removing the dash.
- Assess options for missing parts on the warning lights above the large gauges. A call for ideas on the 6-Pack forums yielded a generous member with spares, who mailed them to me. Test fit into dash, clean and repaint the front bezels.
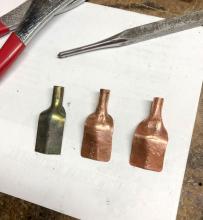
- Make missing clamp parts for the large gauges. I only had 1 each of the shovel clamps for the speedo and tach, and while you can still buy the knurled thumb nuts (which is nice because they are use a British thread that's not commonly available in the US), the clamp parts are NLA. I made new ones from some copper tubing hammered into shape. This is an original next to the 2 new ones.
- Touch up paint around the eyeball vents and lower edges of metal dash visible by the glove box. A mix of gloss and flat Testor's black model paint makes for a pretty good satin.
- Test fit gauges with the replacement rubber o-rings. The large gauges fit well, with the bezel edge at the top of the wood, but the small ones seemed too sunken in. It seems like this was the original look, but they seemed to sit too low to me, and it seems weird to have them at different levels. I tried a few different o-ring options until i found a more consistent fit.
- Fix broken air deflector cable. Used a bicycle derailleur cable and a new cable clamp.
- Paint edges of dash and glove box. The glove box edges get painted brown, since I had to use a bit of filler there and it wouldn't look good just varnished. The dash edges are flat black to better blend in with the black crash pads, and the back is painted brown, similar to original.
- Research options then order a new dash clock to replace the rheostat that I'm not using. I don't want to drill out the dash for a full size gauge, so I'm using a motorcycle clock with a screw mount on the back. Make mount for new dash clock so, it'll screw right into the dash, which should make it easy to remove later for battery replacement.
- Replace driver seat track because the old one was wobbly and I've had one sitting in a box for a few months. Contemplate new seat belt options.
- File out wiper/washer switch holes in metal dash, since the replacement switches have a larger body than the originals. In fact, they have a nice snug fit in the wood dash, so i'm not going to bother with the mounting plate in back unless they fall out over time. The washer switch has the chrome bezel of the later TR6 models, while the wiper switch has the correct black plastic bezel.
- Replace oil gauge line with new stainless steel version from TSI. The current one isn't leaking or cracked, but seems like good insurance.
- Strip the chrome finish from the bezel around the replacement washer switch. I tried a couple of different approaches, but the one that seemed most effective was soaking the part in bleach. After a couple of days the chrome was removed enough to finish the job with some fine sandpaper, polishing it with auto paint polish. It took more time and work than i expected, but looks correct in the end.
- Look at the replacement hazard switch i ordered, which is much larger than the original switch. The original is hard to find, and $150+ at that. And it's a known weak link in the electrical system anyway. I don't want to carve the wood dash larger to fit it, so I look for other options.
- Drill dash mounting holes through the new veneer, drill countersink holes. I waited a few days after the last coat to do this, worried I would munge up the finish. I made a rig that limits the travel of the countersink bit so i wouldn't gouge in too far (unfortunately i don't have a drill press).
Varnish is a slow finish, but it gave me plenty of time to get lots of other things done. A week after the last coat, I worked on rubbing out the finish. This levels the little dust nibs and evens out the sheen to the level you want. Start with 600 grit wet/dry paper, then move on to 0000 steel wool and furniture wax.
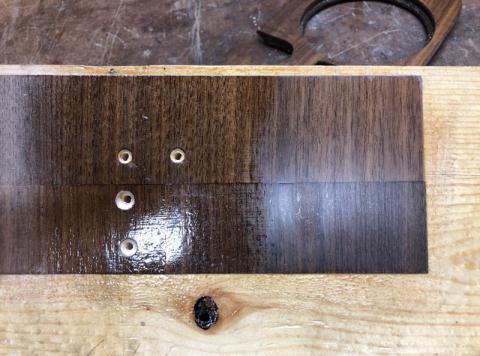
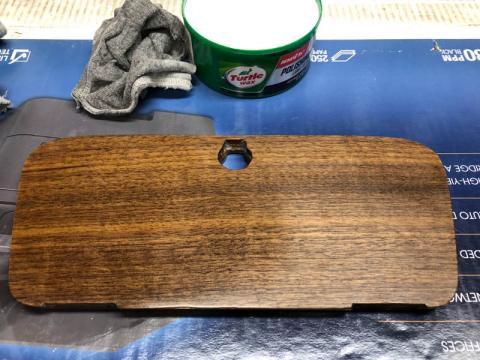
The right side of this test piece shows where the finish is now.
It's not a bad level of sheen, but it's uneven. Maybe because i'm cutting through different layers of varnish, there are spots with uneven levels of gloss, making it look a bit messy. It feels amazing though, silky smooth.
The next step fixes the sheen issue: automotive polishing paste. Here the right side is after steel wool and wax, the left after polishing paste. You can't see the gloss issue in this light, but the improved depth is obvious.
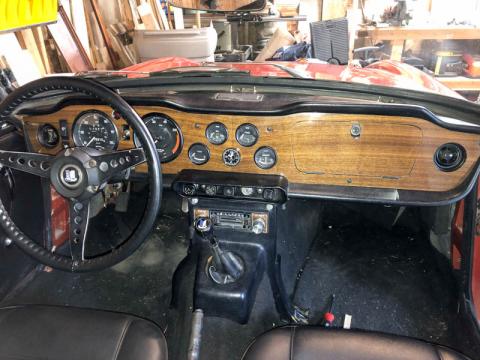
The polishing paste and some elbow grease even out the sheen level and really makes the color pop. An afternoon of the same work across the full dash and a layer of paste wax, and it's done. Another afternoon of installation and reconnecting everything.
It took a bit of shimming to get the glove box lid to fit level with the rest of the dash, and some extended filing time to install the glove box finger pull. The upper right corner was proud of the surrounding dash by almost 1/4", which helped to open it, but looked sloppy. Much better now.
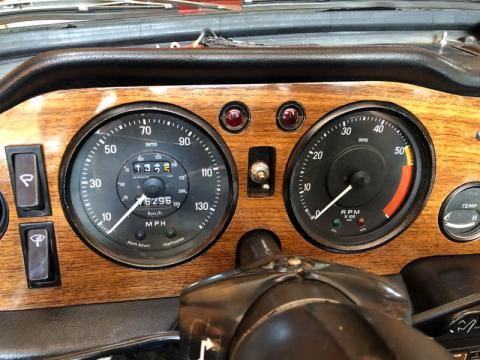
For the hazard light, i ended up punting and digging through the bins at my favorite neighborhood Ax-Man surplus store for 20A DPDT switches. I bought a couple of options, including a rocker switch that was pretty close to the original style, but the mount on that one looked kinda crappy once i had it in place. I ended up using a standard toggle switch mounted to the back of the dash with some scrap sheet metal.
It's not ideal, but at least it's functional, which is more than i had before. You can also see the stripped and polished bezel around the lower washer switch, matching the black bezel of the new wiper switch.
Compared to the black vinyl, the wood finish really brightens up the dash even though it's darker and a richer color than the original veneer. It's a step below a high gloss, which i prefer, but it still has a warm tone. It's really nice to have the full set of switches and lights working again (well, except for the windshield washer, which is missing all of the important parts). With the new switch i finally have a 2-speed wiper now, though i still need to fix the auto-park mechanism.
This was the biggest project of the year so far, with the car off the road for over 3 weeks. It's a bit of an aesthetic improvement, and nice functional upgrade too.
