Well that wasn't so bad, the guts are now out of the gearbox.
It really does help to have multiple sources of information to cross-reference. The official Bentley manual is complete, but puts sections in a weird order, and almost always references use of specific (and unavailable) tools for certain steps. The Haynes book is more helpful so far, partly because of the great number of photos, and partly because they assume you don't have any special tools.
I mostly don't have special tools, though i finally bought an impact wrench to help with the output flange nut (a 1-1/4" socket). On the other hand, one of the reasons i bought a welder last summer was to enable me to make more of my own tools for cases like this.
So I took a hybrid approach, making a couple of pullers to help with steps that might otherwise require a hammer and drift. I have a brass hammer and plenty of wood blocks to cushion the blows, but i'm trying to avoid hammering on parts where i can.
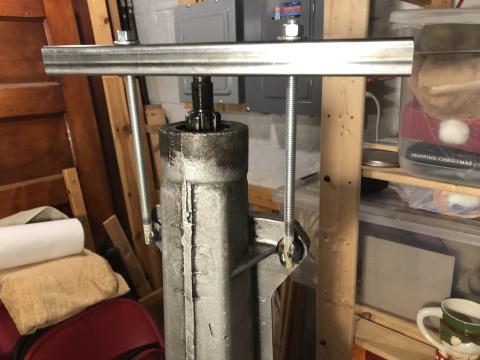
For the tailpiece, i copied a design shown in the excellent Buckeye Triumphs tech articles by welding a 1/2" bolt perpendicular to a piece of 3/8" all-thread. In my case, the scrap i have most of is square steel tube, and that worked fine for the cross member. It didn't take a huge amount of force to pull the bearing off the output shaft.
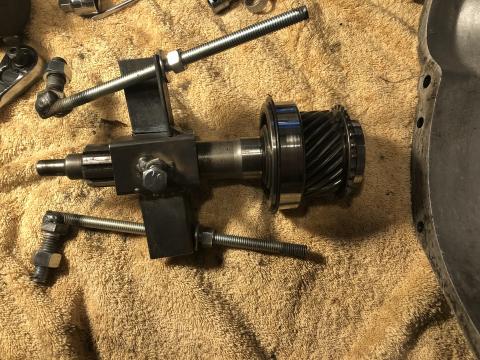
For the input shaft, i used another piece of square tube that just fit over the splines and again copied the Buckeye Triumphs design by welding nuts to the outside, and a couple of pieces of angle to the side. I reused the long pieces from the tailpiece puller to push on the case, just outside of the flange gasket area.
Again, not that much force needed once it's in place with the right angle. This gives me more confidence that it'll go back together without needing some crazy big press.
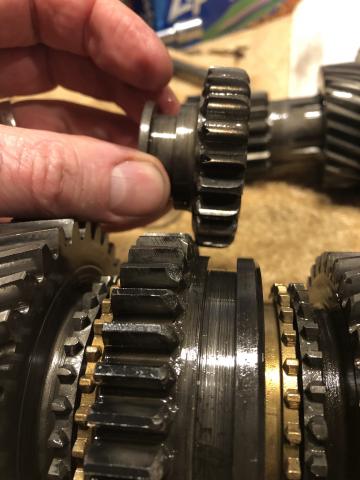
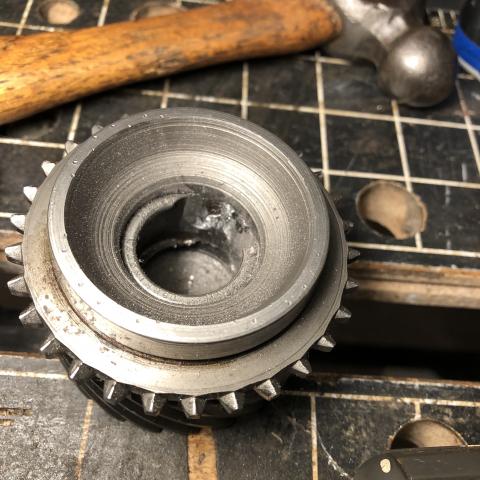
Pulling everything out, the only obvious problem was with the reverse gear, which was chipped and worn along the leading engagement edges (left side of little gear, right side of lower large gear).
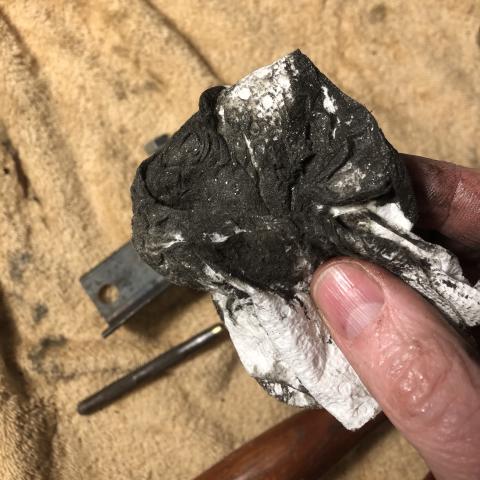
Cleaning out the bottom of the case, there was a fair bit of steel flecks in the sludge.
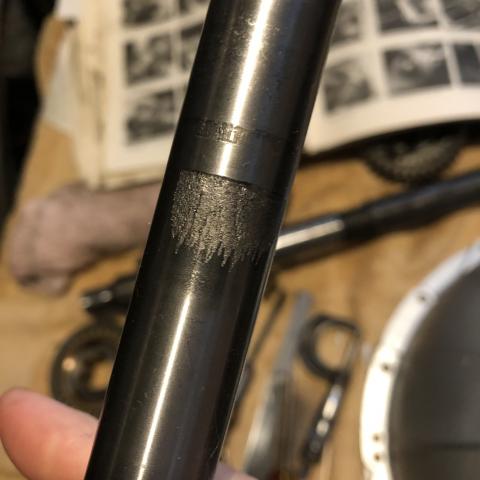
That seems to be from the worn gears and the countershaft, which was getting some wear too. The countershaft is a known weak spot for this gearbox, and this is a typical wear pattern from the stress of first gear use (and likely, quick launches).
Those countershaft roller bearings looked ok, but they're the open slide-in type, and i'll replace them with a longer version that includes a full shell for the outer bearing surface. The inner shell of the first gear end also had some pitting, which is a moot point with the full shell bearings. The countershaft end float measured 0.001" out of spec, so new thrust washers there too. Despite how clean things looked generally, the countershaft certainly would have started making noise before too long, so this fix alone was worth the rebuild.
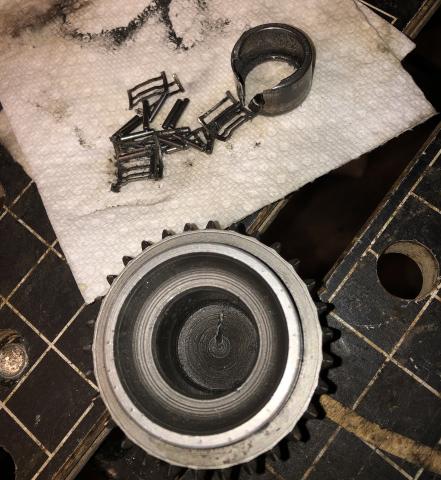
The input shaft already had the shell type of bearing, which was a real bear to remove.
It's almost impossible to get a bearing remover behind it if you have one, which i don't. So i first tried breaking the outer shell, which only worked on the lip. Then i ground down a spot in the shell with a small Dremel stone to thin it down and chip it out. What finally got it was tapping an awl under the edge, then the shell broke and popped right out.
All other areas looked surprisingly good, which makes me wonder if this has been rebuilt at some point. I remember that the first gear oil change i did a few years ago was very green, which seemed to indicate a lot of syncro wear (the bronze in the syncros and bushes tarnishes green), but they all measured well within spec and looked fine. The top hat bush for 2nd gear was also in perfect shape, and it's very common to find that broken, especially the bronze version i have.
Bushing end floats were all within spec. The bushing stack for 2-3rd gear was at the outer end of the range, so i'll get a slightly thicker adjustment washer. Float for the first gear is within spec. Even the main bearings felt tight and smooth, but in the end i added them to the order too, and hopefully i won't have to open up this box again (unless i add an overdrive).
Final rebuild parts order:
- gasket set
- new seals (including for speedometer drive)
- new countershaft bearings (longer version, part number B-1316)
- new countershaft (uprated harder version)
- new input shaft bearing
- new main bearings and rear tailpiece bearing
- new spring for the 1-2 gear shifting rod (was a bit weak)
- new spring for the anti-rattle washer in shifter (was broken)
- new clutch shaft to replace the one i cut apart
Now off to clean everything thoroughly and paint the case, and get ready for reassembly.
