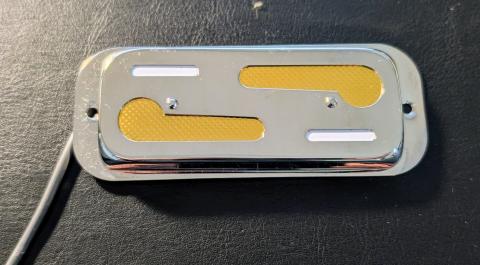
When i modified the Danelectro bass last year, i went into a whole rabbit hole for different pickup styles, looking for something different than the standard precision or jazz bass setup. One of the cool options i found was the gold foil pickup originally used in Harmony basses of the 1960s, which had a good reputation for tone. Curtis Novak sells a re-creation of that pickup (his H22 Goldfoil model), and i was able to find a lightly used model through an online bass forum:
The idea was a simple, single pickup bass, and i liked the idea of a 2+2 headstock, but wasn't feeling ready to build a neck from scratch, so i found one on eBay. The seller decided to ship a lefty Fender-style neck instead, so now i have the basis of the next bass project, but i eventually got the paddle neck that i wanted, but no idea for a body.
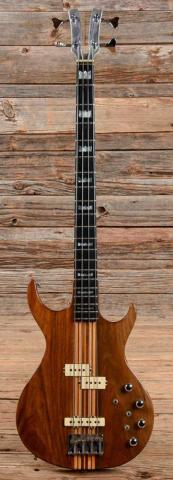
I did a lot of image searching, waffled between semi-hollow and solid designs for a while, but was drawn to the natural wood finish of mid-70s Ibanez and Kramer basses, rather than something painted.
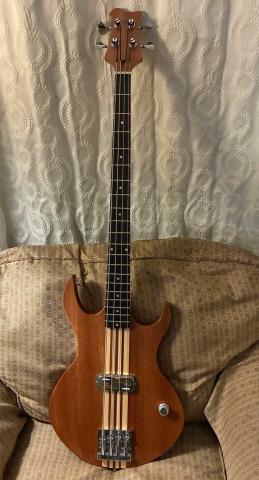
This model (the DMZ 5000) came with an aluminum neck, but i really liked the mix of strong curves and fairly pointy horns in the body shape, and especially the center stripes of light woods with the darker side wood.
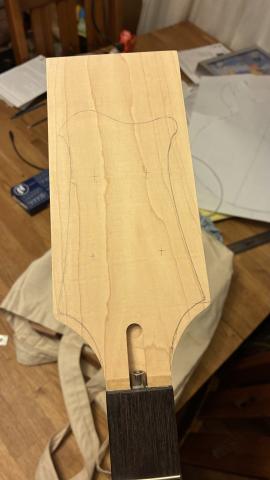
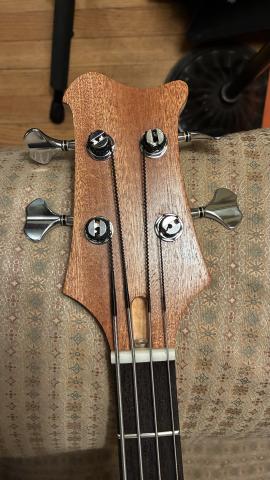
I spent some time drawing up the body shape as a close version of the reference and worked up a headstock shape i liked. This is inspired a bit by the Danelectro, and a bit by Collings headstocks, aiming for something compact but a bit of swoop to it.
The neck arrived fully built and fretted, but missing a nut, and there were other mods i wanted to do. It was 24 frets, and after i drew out the body shape i wanted i realized the body would go pretty far into the middle of the body, with no real access to the frets. I don't play that high and i didn't want to change the shape to accommodate them, so i decided to cut it shorter.
The complication is that there's a steel truss rod in there somewhere that i didn't want to wreck, so i got out my strongest magnets to try to find the end of the rod.
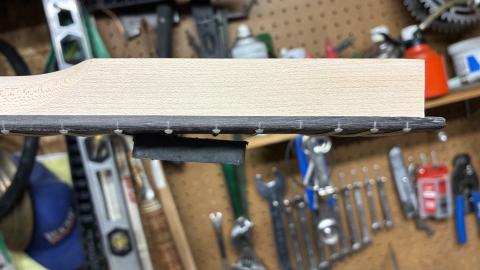
The magnet really lost attraction around the 19th fret, so it appeared that the truss rod ended around there. I decided to end the fretboard at 20 frets, so i pulled the 21st fret and used my chop saw to make the cut.
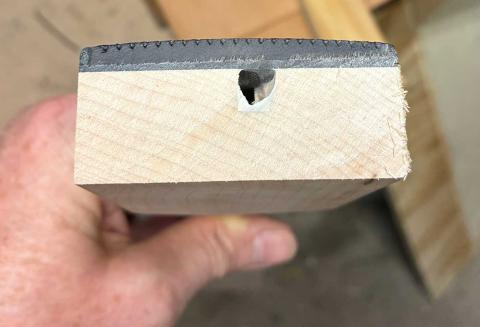
Happily, my guess was right and the truss rod ended before my cut. Unhappily, the channel seems to be off center to the treble side. I don't know if that's just the end of the channel or if the whole rod is slanted. It's centered on the headstock end. I ended up putting a small patch over this end before the final build to cover the hole.
The other mod was to narrow the neck slightly. This is a jazz bass style neck, with a narrow 38mm nut and relatively wide spread, out to 62mm at the 12th fret. My other basses that feel most comfortable are straighter, with a little wider nut and less spread toward the body. I can't do much about the nut, but i used a large shooting board to sand it narrower along the lower 2/3 of the neck.
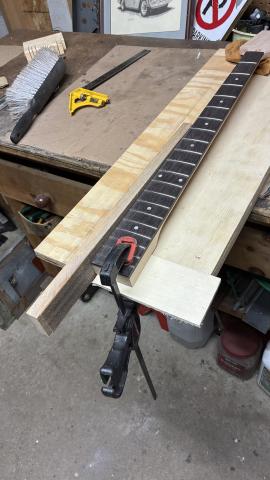
It was a bit slow, but i was able to take off just over 1mm from each side, which doesn't sound like much, but it does feel better in the hand. This required a bit of cleanup on the fret ends and recontour on the sides where it got flatter, but i'm happier with the shape.
For the body, i looked at local hardwood suppliers and ended up getting a nice piece of 8/4 sapele (a close relative of mahogany) and hard maple. With the multi-part glueup i was aiming for, i wanted wood that wouldn't need staining to get the light/dark effect i wanted in the finished body. Of the options i found sapele seemed like the cheapest and a lighter option than walnut or cherry, and has an interesting grain character of its own. One great part of this multi-part design is that i didn't have to find a single 15" wide slab of wood, so i had more options to choose from
I'm a member of our local MN tool library, and their excellent wood shop was incredibly helpful for the initial prep. I used them first to resaw the 8/4 sapele and joint the faces down to just over 1.75", then saw and thickness plan the maple and sapele inserts. This is the mockup of the slab parts before gluing:
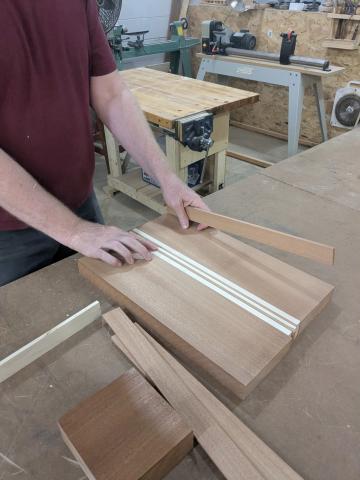
I glued the center strips first then did final fitting to add the side pieces. It came out square and well-aligned, well within the margin i'd left for final trimming and thickness. These are all of my clamps that fit that size of slab. The kant-twist clamps did a great job of keeping the plane alignment.
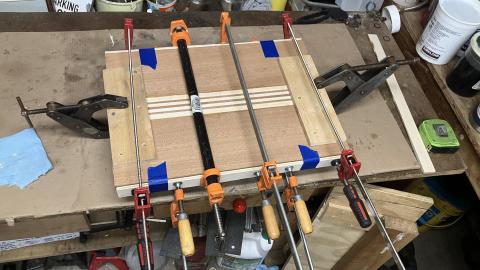
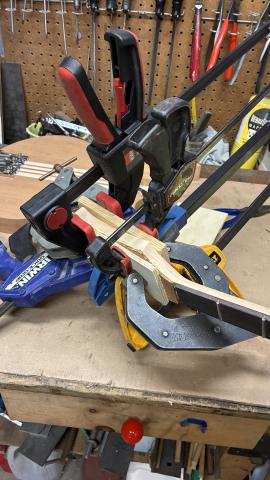
While that was drying I decided to use one of the resawn pieces of sapele to make an overlay for the headstock to match the body. All the clamps that will fit.
Another visit to the tool library shop to use their drum sander to flatten the slab and it looked like a pretty nice cutting board, but a 3rd visit to use their bandsaw and spindle sander improved that. This step would have taken a full day at home, but those tools had it done in under an hour, so nice to have them around.
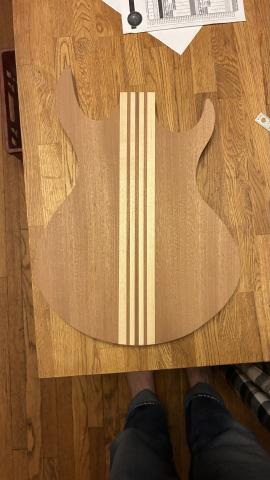
I started to lay out next steps, primarily the neck pocket. It was both a help and a curse having a strong center line in the body wood: helpful, but i also knew that any misplacement would be obvious so i measured many times before making the final marks and cutting the pocket.
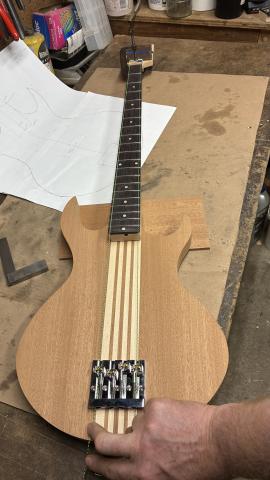
I clamped 2 strings at the nut end and stuck the bridge in place with double-stick tape (carefully centered), then aligned the neck to make sure it would be straight. The depth was calculated by measuring the thickness of the neck heel and subtract the height of the string above the body at the bridge and the height of the desired string action. Then i used forstner bits to remove most of the pocket (leaving it a bit short for final fitting) and finished with hand chisel.
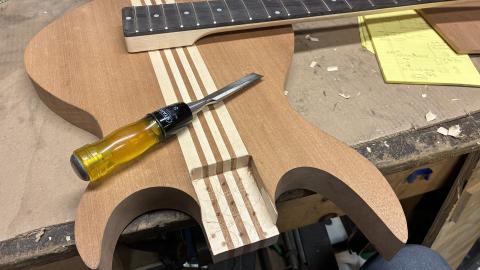
I was continually checking the fit as i went to sneak up on a snug fit at the right alignment, and it came out great. The main change i'd make for next time is to make a custom jig and route the pocket to avoid all the pock marks from the forstner bit. It's a good fit. With the neck position set i could mark out and drill pilot holes for the bridge.
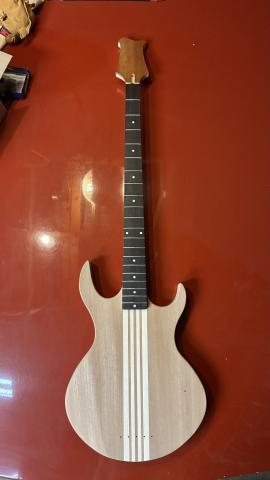
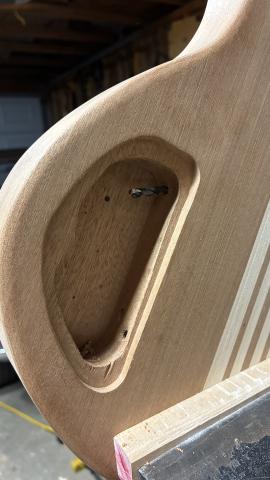
Next i worked on the control cavity. I'm not sure exactly how i'll wire it, but I wanted to leave space for volume and tone controls without a huge space. I used the forstner again for the main material removal, but later cleaned it up with a small router.
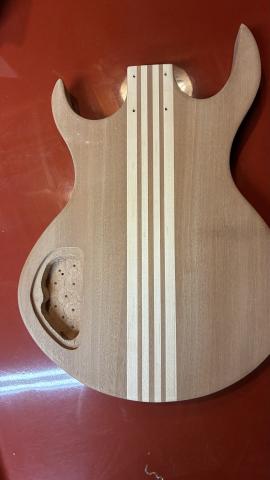
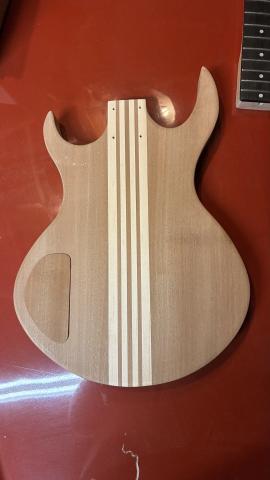
The template i made to route the upper channel slipped a bit while routing, so i had to hand cut the cover and sneak up on the fit, rather than routing out the shape. Acceptable result, but a lot more work. I should have done more grain checking before making the cover - the grain is almost perfectly matched by dumb luck, just off angle a bit from the rest of the body.
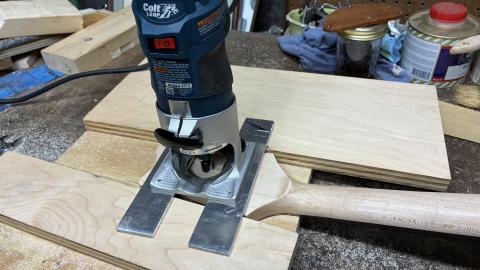
I did some final checks for hardware and glad i did - my headstock was now too thick for the tuners, after adding the overlay piece. I trimmed the front a bit thinner and routed the back to a more standard 0.60" thickness. This was a bit nerve-racking, but I made a couple of skis for my router to span the headstock and keep the cut well controlled.
This is one of 2 scary holes to drill through the body, this one connecting the pickup to the control cavity (the other for the bridge grounding wire). Since that gold foil pickup is surface mounting i didn't need to route a cavity for it, just drill for the signal wire, which somehow made it harder. I'm sure professionals have a template for this, but I just eyeballed it.
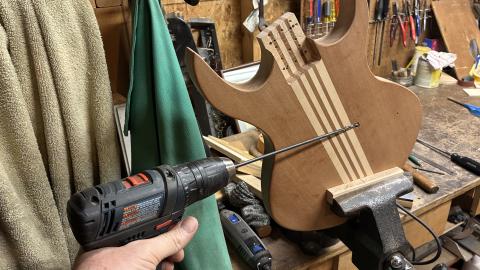
And the hole came out perfectly, even better centered than the ground wire hole at the lower end of the cavity.
At this point I started adding finish to the body and neck and switched modes to the metal shop for a bit while that cured. Off to the metal lathe!
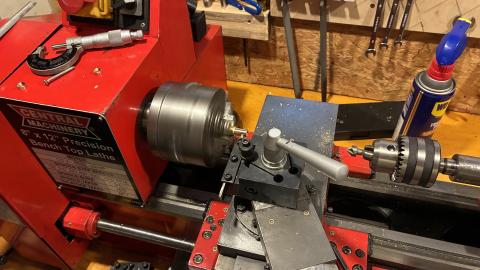
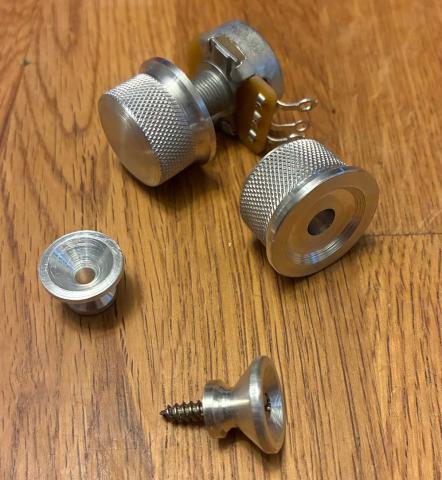
I have this lathe and lots of bar stock, so i thought i'd make some parts that i'd otherwise have to buy. I made strap buttons and control knobs out of aluminum.
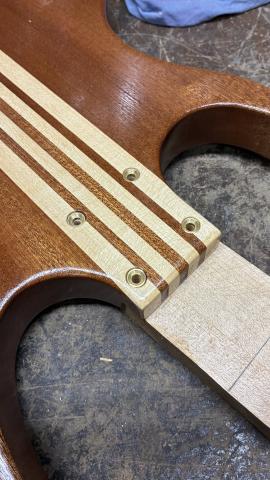
I also made ferrules for the neck screws, this time out of brass. This seems like a cleaner setup than the standard neck mounting plate, and hopefully about as durable given the stiff wood in the body here.
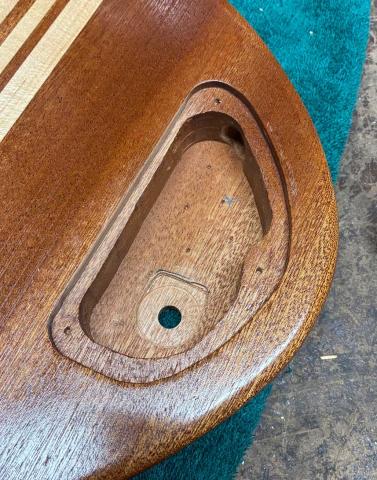
Final fitting for the controls, i needed to thin the wood where the control pot is mounted, even with the longer bushing version i got for the build. I used a forstner to recess a pocket for the inside then routed a section for the connections.
With the pieces ready, i did the mechanical assembly and started working on the setup. First was to make sure the neck was at the right depth to hit the right string action within the adjustments i had at the bridge. The pocket was shaved down about 1/2 mm with a very slight angle to bring the action where i wanted it.
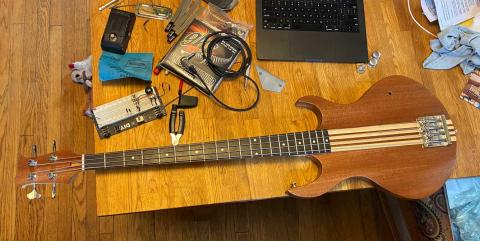
Once the woodwork was done i brought it inside to figure out the circuit. Since it's just one single coil pickup, i wanted to keep the wiring simple too, aiming for just a volume knob. I set up a standard circuit on my breadboard (left, just above the neck) with 250k pots for volume and tone, with a few different capacitor values to test. I don't know how this pickup compares to others, so while the passive circuit should work, i wasn't sure about the values. After some testing with my small practice amp i settled on a static 220k ohm resistor and 47nf capacitor, which are pretty standard for a Fender Precision bass.
I may revisit the tone circuit after i've had some time with it on other amps, but this seems like a good baseline to start with. I use a volume knob regularly but rarely the tone, so i think this will work well for me. The current strings on it are GHS Pressurewound, which are really just slightly flattened roundwound strings, so there's more finger noise than i'm used to. I will likely change it to flats once i can get out to buy another set.
So here's the final bass:
Headstock detail, i may add some kind of inlay here, i haven't decided yet. This is a bone nut that i made and got extremely lucky on the slot depth on the first try.
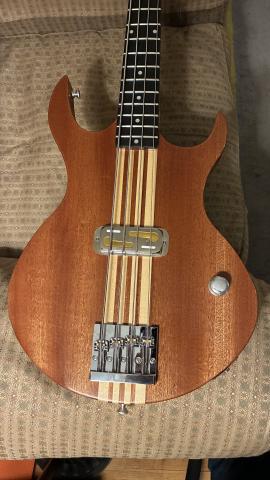
Body closeup, you can see how the wood grain in that sapele has stripes that shimmer in the light with that varnish. This is 4 very thin coats, enough to give some sheen but the pores are still open.
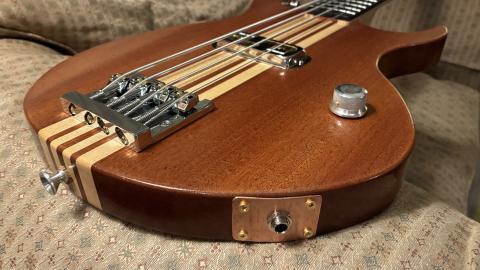
Lower body detail, you can see the knob, lower strap button, and jack plate. The plate was flattened and formed from a piece of copper plumbing pipe. The hole ended up slightly off center somehow and is just slightly askew. This bothers me enough that i'll fix it, but not enough to fix it today.
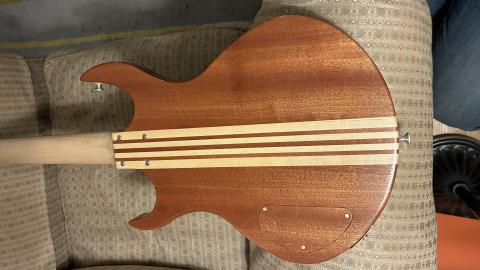
Back of the body. Again with the shimmering sapele grain lines, you can see how the grain on the cover is just slightly misaligned with the body. The maple stripes in the body are also slightly different than the neck - different pieces of wood and likely different species of maple, plus the neck just has a bit of shellac and not the amber varnish that's on the body.
I'm planning to start practicing with it this week and give it some time to settle in before relying in it for gigs. So far i'm really happy with it. The balance is good, and it's a comfortable 8.3 lbs, so not too heavy.