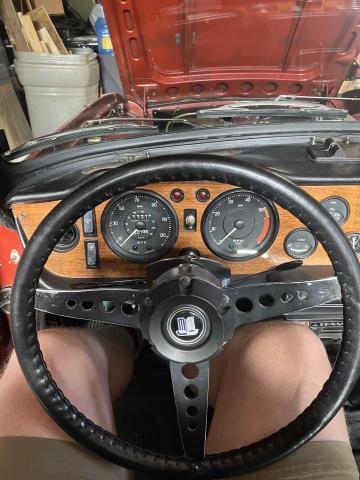
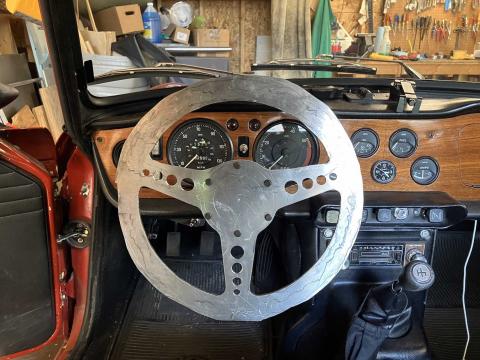
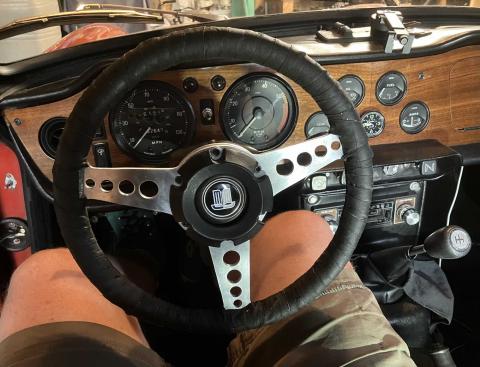
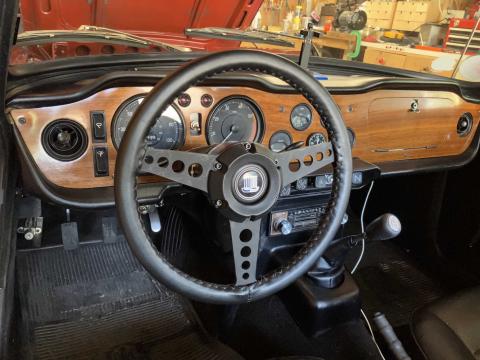
The original 1969 steering wheel was a unique design for that year, with a different center hub than later years, and a series of holes similar to racing cars and Jaguars of the period. Here's my original wheel with a black leather cover and some excellent patina.
The problem, for a tall driver like me, is that the original wheel is also huge. It's 15" across, and while I love the proportions of the wheel I don't love that my right leg is constantly against it while I'm driving.
There are plenty of replacement wheels available, though all of them cost $200 and up and require replacing the center hub. I like the unique look of the center pad, and I like the idea of only replacing the wheel, so I decided to just make my own.
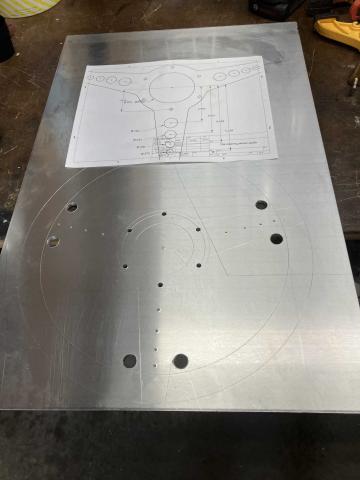
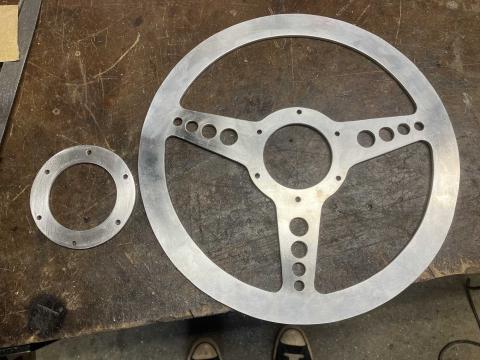
I made a CAD drawing of the critical dimensions to replicate the center structure of the wheel and laid it out on a piece of 3/16" (7 gauge) 6061 aluminum. I got it from a local metal supplier as a cutoff for $24.
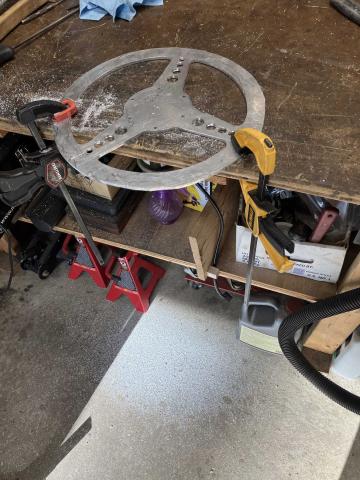
It would have been a lot clearer if I'd sprayed dye or something first, but scratching it out with a protractor and caliper worked just fine.I started with the mounting holes, the only measurement that really matters, then started drilling out access for a jig saw. The base of the jig saw made a mess of the surface, but that's easily cleaned up later.
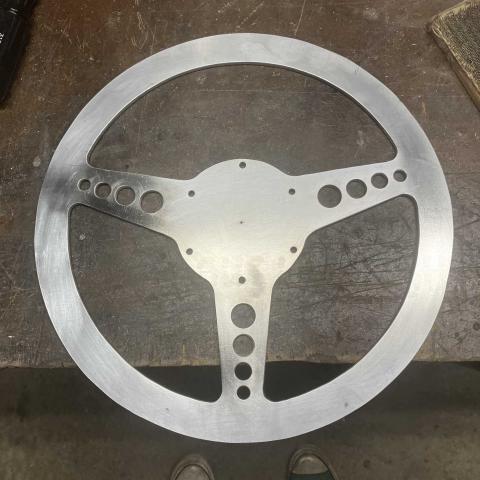
With the rough cuts done I started drilling out the spoke holes. I used a large bit for the smaller ones then switched to a step drill for the rest.
I decided to do a quick test fit to make sure I was on the right track before getting too far into shaping. So far so good, but still feels a bit dangerous for a drive. I didn't mount it firmly, just confirmed that the mounting holes are right.
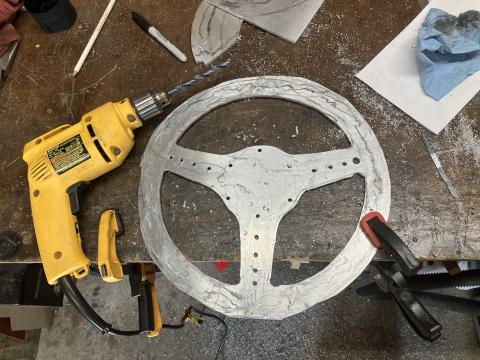
Then the filing began in earnest. I made quite a pile of aluminum bits of much filing.
This is when I seriously wondered why I didn't look for a water jet or laser cutter to make a cleaner blank earlier. I eventually ended up with a decent shape
The original wheel is slightly dished. Since I'm making this from a single piece it seems difficult and maybe risky to form this 6061 aluminum without cracks. To help account for that, I thought a spacer would help bring the wheel forward a bit.
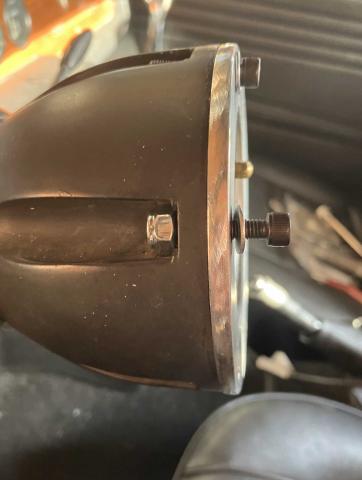
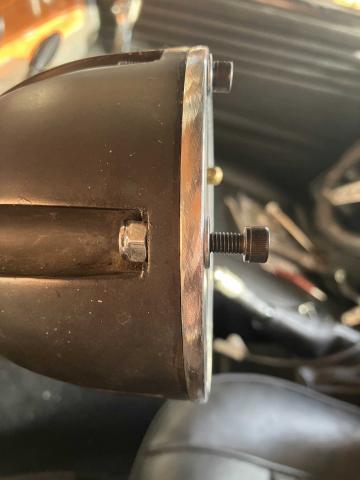
It's time for a real test, but I ran into a snag. You can see from this view that the wheel mounts on the hub with a nut and bolt. I bought longer bolts to account for the spacer, but the nuts are slightly too large to fit into the slots in the back of the hub. There's no room for a socket, let alone a wrench, so the hub has to hold the nuts to be able to tighten the bolts.
After filing down opposite flats a few thousandths the nuts fit perfectly. You can see it's tight against the flange here.
With the fasteners working I taped on a temporary foam grip for a test fit and drive.
I could immediately tell the difference in space around the wheel - there's a gap above my legs, and the difference in steering effort seems negligible. The rim size felt good, but overall the wheel looks small to me. I decided to thin the outer rim, and that made it closer to the right proportion. I also painted it black like the original.
I thought for a while on what to do about making a round grip. Most similar steering wheels use a wood rim, but I'm planning to use a leather cover on the wheel, so it doesn't seem worth the trouble to make the right shape in wood. I looked at several options for different foams, but nothing seemed like a good fit or easy to work with. In the end, I was inspired by the cork grips on one of my bikes.
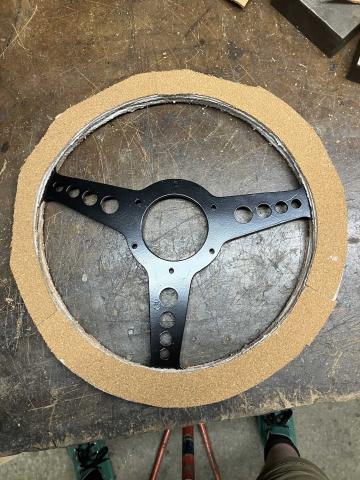
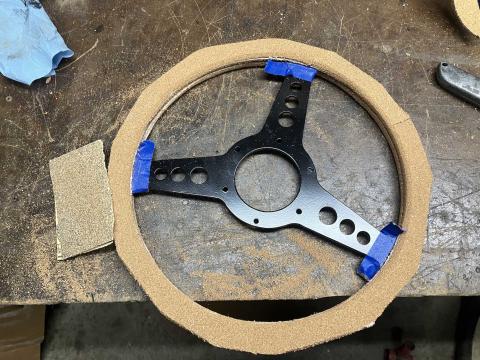
Cork is easy to shape and has a little cushion while staying firm. I got a roll of 4mm sheet cork from the craft store and cut out some arcs then glued them on with high-strength adhesive spray.
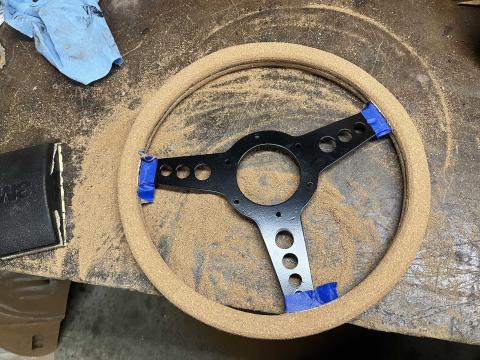
Then I trimmed away the big pieces with a utility knife and started sanding with 50 grit paper. I protected the paint with some masking tape.
The cork sands easily, so I focused mostly on making good curves and bringing the size down close to the (new) thickness of the rim. I switched to 120 grit to smooth out the surface.
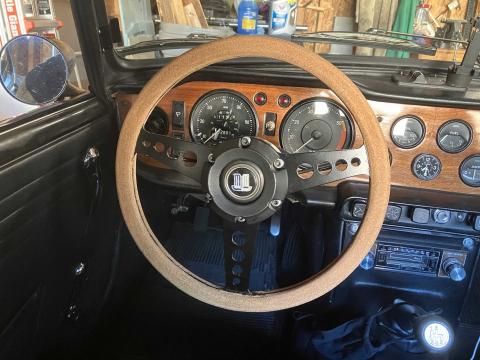
It's still a bit squarish, but I'm keeping it like this for a bit to see how I like the shape before I order the cover. I'll likely round it a bit more but I think the size of the rim is good. Here it is fully installed.
The wheel seems visually larger with the thinner edge, and it helps a bit to see the gauges, which are partially blocked with the smaller wheel. The horn still works fine with the spacer in place. The cork feels great, but I'm sure I'll take a chunk out of it sooner or later, so it'll get a black leather cover like I have on the original. The cover will double the cost of the project, to about $120 total, including metal, cork, and new bolts.
It was a lot of work, but I'm happy with it, and love that it looks like it could be original to the car.
Update: I repainted the center to flat black and installed the new black leather cover using a cross/corset stitch.
