There are lots of good arguments for replacing the seats in a TR6 with those from a Mazda Miata or similar more modern design. New foam and covers are expensive, and upholstery is difficult to get perfect. But the seats in a '69 are unique, the only year they were used, so i thought it was worth trying to rebuild mine rather than replace. Although they don't recline like later seats, i like the high back and the tilting headrest, and i figured that with the correct padding back in them they should be pretty comfortable too.
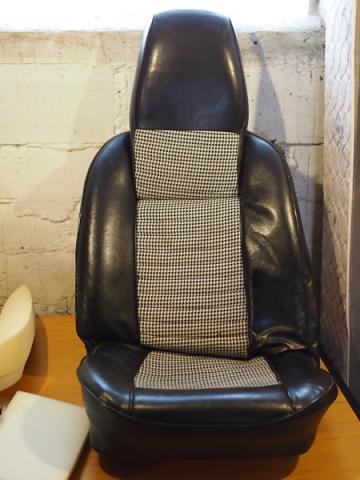
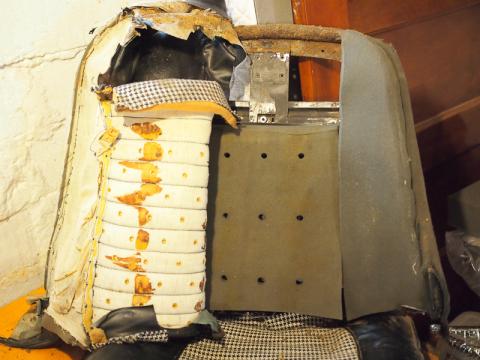
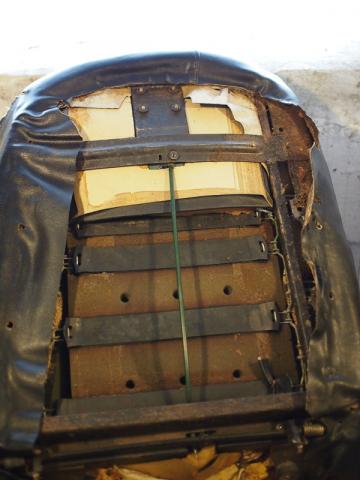
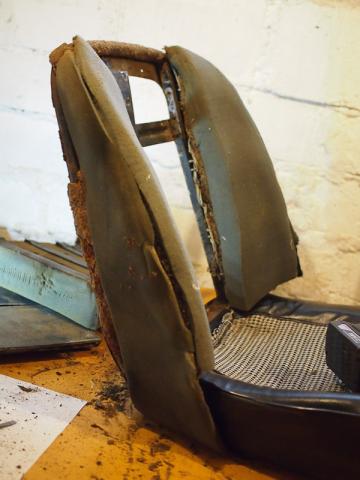
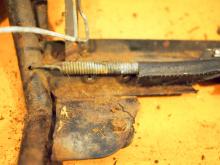
This is what i started with:
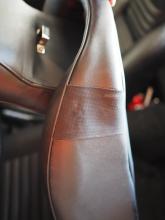
The seats in my car were re-covered at some point with what appear to be custom-sewn (likely home-made) covers made from a houndstooth center panel and black vinyl. They re-used sections of the old covers, so the original perforated black vinyl center panels were still there, sewn under the houndstooth. The cloth panels are stained but otherwise in good shape, but the vinyl is torn in places and dry and cracked.
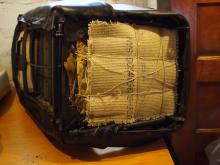
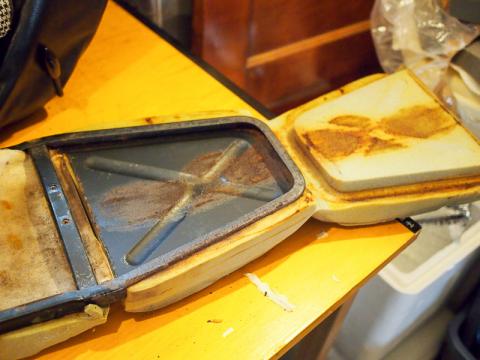
The foam in the headrest was in good shape, but foam in the seat bottom and back was crumbling and pretty flat. The rubber diaphragms for the seat bottom were missing, replaced with carpet and twine.
Seat Anatomy
The 1969 TR6 seats are unique, the only year they were used by Triumph, and different from both the earlier TR250/TR5 seats, and the TR6 seats used from 1970 on. The 1969 seats don't recline, but have hinged headrests that fold down using the same lever mechanism that allows the seat to tilt forward. The seat bottoms are the same as other Triumph seats, but the back and headrest are constructed differently than others (from the other documentation i've found), so i thought it would be helpful to document the '69 seat construction and rebuild process.
The seats mount the car in the usual way, with 2 bolts in the front, and the latching mechanism in the rear, tilt lever to the outside. Note that all TR seats install slightly angled away from the center of the car. There are 2 bolt holes on the seat frame, the bolt toward the center of the car aligns with the rear one, the outer mount uses the forward one.
Headrest
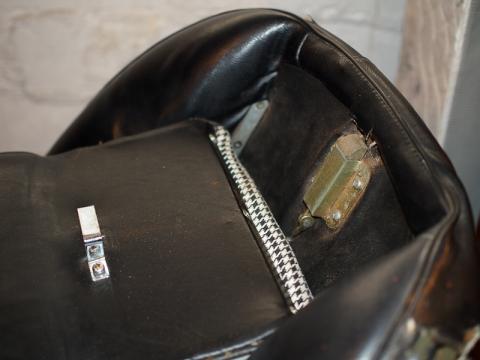
The headrest is attached to the seat back with a pair of hinges. All screws are posidrive machine screws, going into nuts welded on the frame. The square loop at the back is the catch for the tilt bolt, similar to a door bolt.
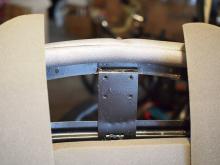
The bottom of the cover is attached with 3 screws that capture a flat steel bar wrapped in the end of the rear flap. The cover slides up over the foam (i opened the side seams a bit since i'm not reusing it).
The foam is in 2 sections: 1 that wraps over the top of the headrest with cut pieces that fill in the space around the rails, and a separate block for the lower part near the hinge. For both sections, the foam was glued directly to the frame and at the edges where pieces met.
The frame is a formed steel channel with panels in the center. A flap of fabric in the cover goes through the gap between the panels to help anchor the pleated section of the cover in place. All hardware (other than the cover retaining screws) are anchored by brazed-on nuts.
The tilt mechanism is actuated by a cable, similar to a bicycle brake cable, from a tab on the seat tilt. The cable housing is anchored at the top end with a fitting screwed into the frame, and the bottom with a clip-on fitting. The cable is permanently mounted at the top end, and fits into a barrel clamp at the bottom end where it connects to the tilt lever.
The tilt bolt is mounted to the frame and also holds down a trim panel that covers the space behind the headrest when it's folded down.
Seat back
Most TR6 seats have a 1-piece seat back cover that slides over the complete assembly, and anchored at the sides with hardboard pieces and hooks that attach to the frame. On the '69, the cover fits only around the front and sides, with a separate back panel that clips on to the frame with the same style of clips used on the door panels.
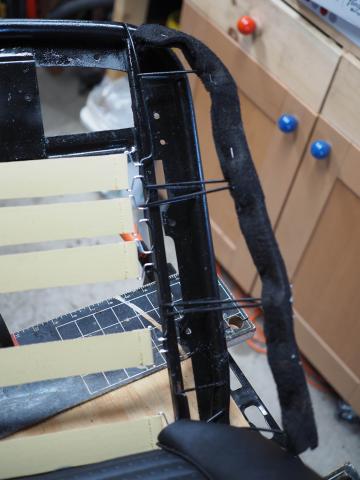
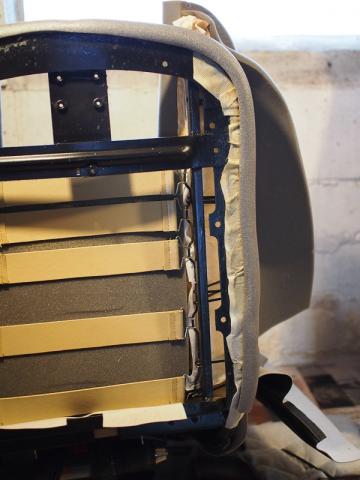
With the back panel removed, you can see the 5 rubber straps that make up the structure across the back. These are solid rubber like rubber bungee cords, and not the more typical Dunlop straps used later. They attach with metal clips to loops in the side frame. Mine aren't in bad shape, but dry cracks on 50-year old rubber isn't reassuring. The center padding is a wedge of foam, thicker at the bottom, and glued to the rubber back straps.
The cover wraps around the sides, with large flaps at the sides wrapping around the tubular section of frame at the bottom, attached with large clips.
The cover is glued at the edges around the upper trim panel and around the sides, underneath where the back panel clips on. The center flap's top and bottom edges were attached to the frame with hog rings after wrapping around to the back.
The side padding is built up from a layer of burlap anchored at the inside edge with hog rings, a base pad of horsehair, then a wedge of rubber foam. A thick layer of felt stapled around the wire subframe eases the corner. The burlap base continues around the side and glued to the frame tube, with a skirt of thin foam sheet on top. It looks like there should be a 1/2 round section of padding around the top frame tube (on top of the glued burlap), but it's almost completely disintegrated on mine.
The side bolster structure is 1/8" steel wire formed in 3 sections to follow the contour of the seat edge. A separate formed rod spans top to bottom, with a short straight section bumping out for each rubber strap, the strap tension held by the 3 sections that are in turn anchored in the frame tube.
The burlap, under tension, fills the span between rods and the horsehair gives some structure, with the foam pad providing all of the padding. The replacement version of this is a base fabric of nonwoven fabric, a 5/8" layer of dense foam, and a standard foam rubber shape on top.
Seat bottom
The rearmost 5" or so of the cover wraps around the frame tube, trapped by the side strip from the back cover. The front part of each side and the front edge are wrapped around the thin lower L part of the frame and secured with 3 small clips per side.
The rear edge of the cover has sewn-in tube. A spring goes through the tube and secures to each end of the frame tube, just below the rods for the side bolster frame (torn from the cover on this seat).
The rest of the seat base structure matches other TR6 seat designs. A thin foam sheet wraps around the sides of the base. The seat foam base is glued to the top of the frame, with the shaped 3-sided piece on top. The cover flaps are glued to the seat base between the seat foam layers before the ouside of the cover is stretched down to be clipped to the frame.
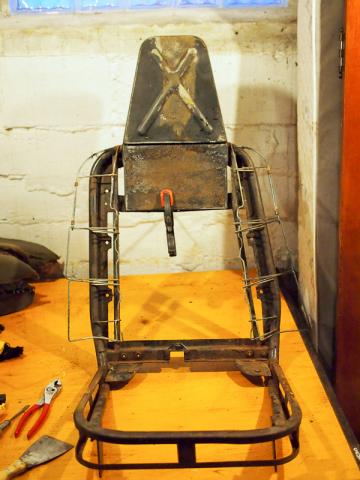
The bare frame, headrest frame clamped in place:
Cleanup and inventory
I de-rusted and repainted everything that had paint, replated parts that were plated, and replaced all of the screw fasteners. It's handy that all of the screws are 10-32 thread, with just a couple of variants. I found pozidrive versions for all but the flat heads, so i need to remember those are standard phillips.
Full parts list for each seat:
- seat frame (including side bolster wires)
- headrest frame
- pair of headrest hinges
- headrest latch (with attached cable)
- cable housing
- clamp for upper cable housing
- clip for lower cable housing stop
- cable clamp for lower attachment with tilt rod
- seat tilt mechanism (bar/lever unit with springs and mounts)
- tension spring for lower seat cushion
- 5 seatback straps
- seat bottom rubber diaphragm
- 5-6 round spring clips
- 20 or so small spring clips
- metal bar from headrest cover (save and reuse)
- latch catch for headrest
- 8 10-32 x 1/2" flat head (headrest hinges)
- 2 10-32 x 3/4" pan head (rubber buffers)
- 11 10-32 x 1/2" pan head (headrest latch, cable clamp, tilt lever mount, latch catch)
- 3 sheet oval head metal screws, with washers
- 2 rubber buffers, with washers
- foam kit
- seat covers
- back panel (new with cover kit)
- insert panel, behind headrest latch (recover with new vinyl)
- clips to attach back panel
For this rebuild, I'm replacing all of the seat foam and using original style black vinyl covers from John Skinner in the UK. I found a 50-pack of 10-32 stainless screws on eBay, other parts were a mix of the usual Triumph parts suppliers and the neighborhood hardware store.
Reassembly
Seat bottom
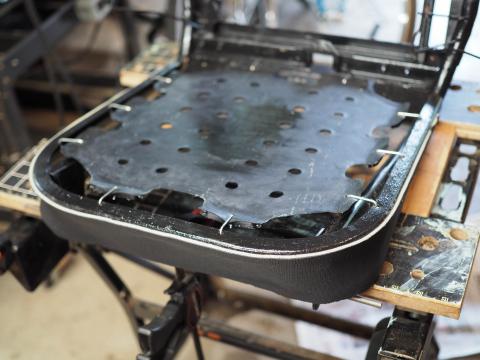
The seat bottom is pretty much identical to other year TR6 seats, so i don't have much to add. The rubber diaphragm is under a fair amount of tension, so get a helper or find a good way to clamp the seat frame to your work bench. Vise grips might help.
This is when i installed the thin foam wrap around the lower part. I put a rod through the mounting holes and clamped that to a work table.
Mark the base foam where the inner sides of the upper form hit, as a guide for cover location and where to glue for the flaps. Glue the flaps to the lower foam, then glue the shaped upper foam, trapping the flaps between. Insert the tension spring in the tunnel at the back of the cover and install spring to the frame.
When i ordered the seat covers and foam from John Skinner, he recommended also getting this roll of wadding "for filling out small areas". I had no idea what that meant, but i did use a couple of small pieces at the rear corners to fill out some puckers near the pleats.
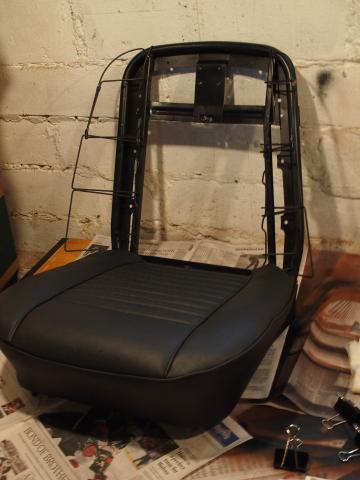
The finished seat bottom came out nice and smooth.
Headrest
For some reason i didn't take any pictures of reassembling the headrests. They're pretty straightforward.
The shaped foams glue to the upper curve of the frame, to fit around the frame edge and fit together flush at the edges. I used fairly light glue on the center, and better coverage around the edges. Square foam glues to the lower frame, make sure to keep the slot in the frame open.
Put a standard supermarket produce bag over the foam to make it easier to slip the cover over. The opening of the cover looks way too small to fit over all that foam, but it'll slide on just fine with the plastic bag. Be sure to support the ends of the seams - on both of my covers I ripped about 1/2" of the vinyl right next to one of the seams stretching too much over the foam.
Adjust to center the cover on the corners. Pull the inner cover flap through the frame slot and glue to the back of the frame panel to provide tension. Make sure all of the foam corners are neat before pulling the bottom corners of the cover over the frame. I had a fold of foam there that made it very difficult to make the last corner until i arranged it better.
The front flap of fabric clips to the frame, past the lower bar. The rear fabric gets glued around the flat steel piece, which is attached with 3 sheet metal screws into the frame. This was a litle tricky, getting the vinyl wrapped around the bar in the right place and so the vinyl would lay flat with even tension.
Locate holes in frame for hinges (the side with the more obtuse angle screws onto the headrest), and for the rear latch catch and install. The catch angles down slightly, be sure to reinstall it the right way up.
Seat back
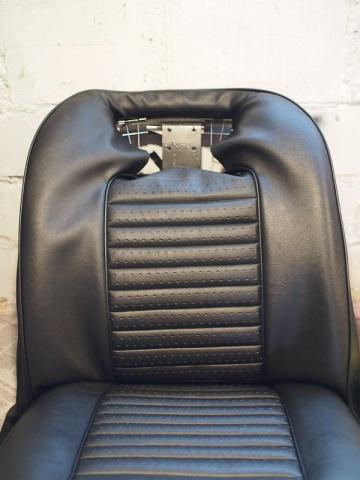
The back cover was the most challenging part of the whole project, and the biggest deviation from other model year seat instructions. The challenge is that top area, where you have to basically wrap vinyl to create a sort of torus shape, with enough padding to fill out the space, but not so much that you can't get all the edges attached where they need to go.
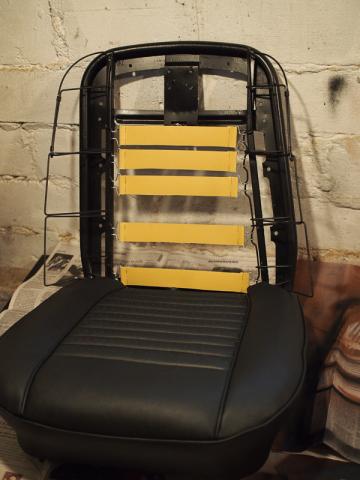
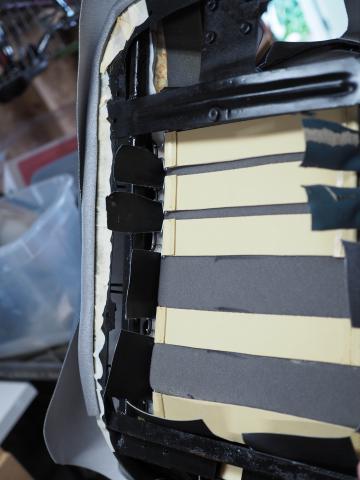
New Dunlop straps for the back, to replace the cracked rubber ones.
The original felt strips were stapled back in place over the side wires.
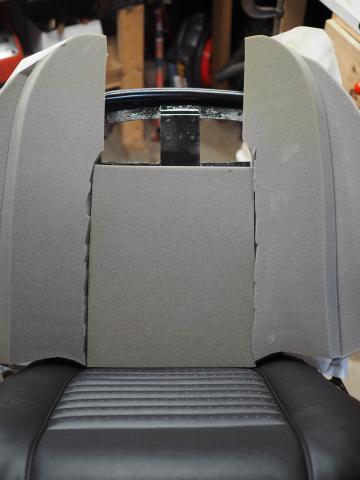
Then to test fit the foam. I made 2 small modifications to the seat back pieces that helped with the fit. One was to trim the edge of the side foams so the 3 main pieces fit better, and to move the transition from center to side foam a little wider, to better match the cover.
The side foam assemblies get clipped to the inner frame with hog rings, and the outer fabric is glued around the main frame tube. A half-round of pipe insulation foam glues on over the main frame tube. I used brush-on contact cement for this and all the remaining gluing work.
The other modification was to hand-sew small tabs on either side of the pleated area in the cover. On my old seat covers, only the passenger side of my set had these cover tabs, and they weren't sewn in to my new replacement covers, but they helped to pull the center panel down into the dished in section of the back foam. Without a little tension there the center of the cover would float a bit above the foam. The tabs were cemented to the inner rails during final assembly.
With the foams in place, the cover goes on. The bottom edge of the cover gets snugged down and clamped around the seat bottom rails, making sure the pleats were parallel with the bottom and even side to side. The center of the bottom wraps around the foam and gets hog ring clipped to the lowest strap. Other than a few clips along the lower sides, the whole upper section of the back cover is only glued on. This is where it got more complicated.
I spent time over multiple days figuring out how to approach fitting this upper cover around the top area, and how best to avoid puckers and wrinkles. The old cover was very smooth through here, so it seemed possible, but the initial trial fittings had loose voids and odd puckers around the corners.
The upper hoop of the seat frame got an extra piece of the pipe insulation, plus some of the loose wadding for a smoother transition to the side foam. Because the original foam was missing, it was hard to tell what it was originally there, but assuming that it should fill the cover, i kept filling in until the contour looked about right.
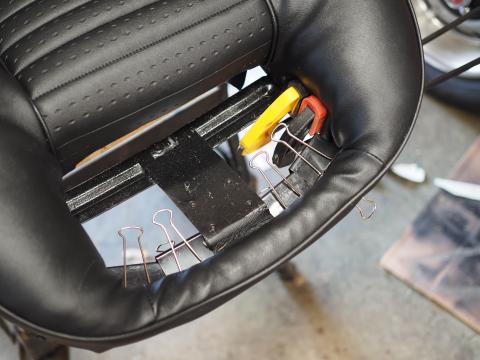
Lots of trial fitting with different versions of wadding in all areas. The transition at the top edge of the pleating was the hardest area to fill out without creating new wrinkles. Large binder clips were invaluable for temporarily holding the cover in place. Things were still a bit crooked in this pic.
In the end, i aimed to get the foam and wadding as smooth as i could and trusted that smaller wrinkles would work out as the seat settled in, and that has worked out just fine. I got all of my clamps and clips ready, glued everything, and just forged ahead, trying to keep the cottony batting out of the glue, and my gluey fingers off of the vinyl.
The binder clips kept most areas in place while the glue set. One side of the inner rail had enough gap for binder clips, the other needed woodworking clamps instead. None of this was under high tension, but just enough that fresh glue would slip.
While this was drying, i recovered the cardboard backing for the area behind the headrest.
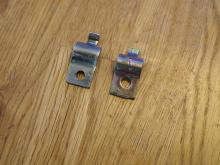
After everything had a day or so to dry i started reassembling the latch parts. Because of the fixed mounts, there isn't much to adjust. I was missing a lower clip for one cable, but TRF stocks them. I was also missing a clamp for the top of a cable, but that was easy to fabricate (new one on the left). It got zinc plated along with the other metal parts.
Before installing the headrest, lube the cable and be sure that the whole lever, cable, and headset release are working smoothly. The cable mount rod for the headset release screws in to the release bolt, so you can adjust the range of motion there if the bolt isn't catching. If it was working before the seat rebuild, it's best to leave this alone. The only other adjustment is the length of the cable, to make sure that the bolt is moving in sync with the seat back latch. Make sure the release has full range of motion and is extended fully when the seat is latched.
Installing the headrest hinge to the seat is the other big frustration in this project, just because there's no room to work in there. Make sure the threads are chased ahead of time, and that you cut a hole through the vinyl there rather than just punching the screw through. It mostly takes patience.
After installing the seats, i had one more modification to make. On my car, with the top down, there was a sharp corner on a reinforcing plate in the convertible top frame on the driver side. The first time i tilted the seat up i made a 1/2" tear in the vinyl. I saw this hole on the old seats and should have fixed this long before but oh well. I filed the sharp corner smooth and put a patch of black cordura on the seat to keep it from happening again.
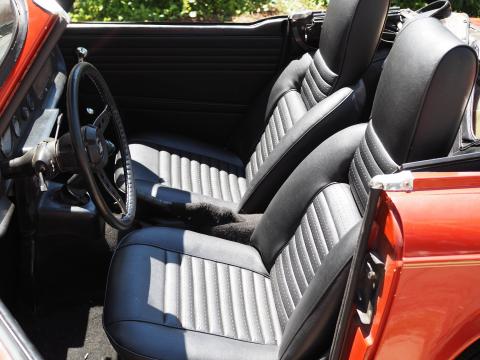
Finally, both done and reinstalled.
They aren't perfect, but I'm really pleased with the results. The small wrinkles around the top edges did smooth out nicely after a couple of weeks. The car is a lot more comfortable for both of us, despite sitting an inch or so higher now (not ideal with my long legs). Like Ed noted after his seat rebuild, i'm not convinced i'd want to do this job again (at least not something this complex), but it does give me an appreciation for the craft.
