I finally finished the multi-phase kitchen update started in earnest 5 years ago. Way back in phase 1, the plan was to remove the former back door and make it a permanent wall, and I even planned to do that the next year. Well, it's done now anyway.
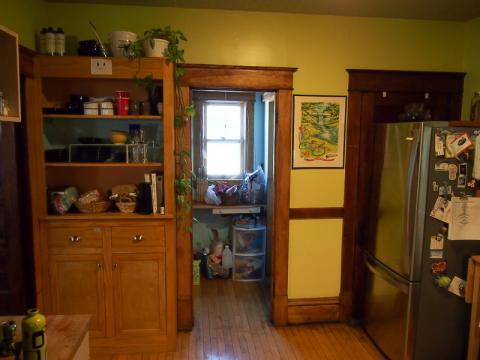
This is where we left off with the refrigerator area of the kitchen:
Functionally complete, with the pantry passthrough to the back yard, and the original back door blocked by the fridge. It worked, but it wasn't really right.
It was time to take out that door and replace it with a wall.
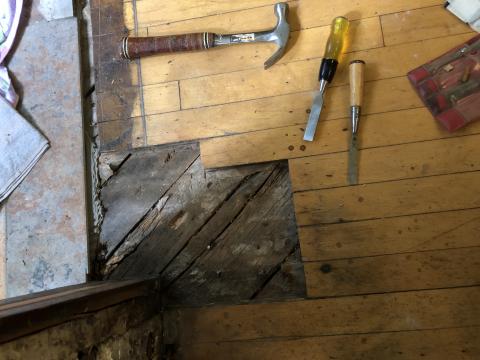
First task after removing the door and trim: fix the floor boards rotted decades ago by the leaking ice box.
Happily, I had a supply of correctly-sized maple flooring after replacing the partially rotting bathroom floor a few years ago. Always save wooden bits when you work on an old house. You never know when they'll be useful.
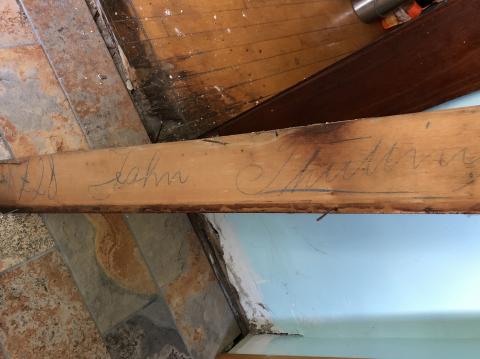
Speaking of old wooden bits, this is the back of one of the door jamb trim boards:
#728 John Thullin(?). Not sure about the last name, but he had nice handwriting and apparently something to do with the building of our house in 1909.
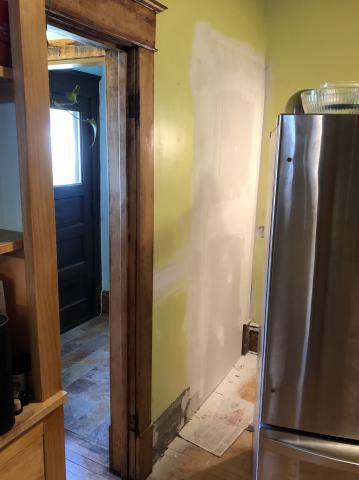
The wall took some planning, because I wanted to retain the jamb for some storage on the entryway side. I ended up with a layer of 1/2" plywood and drywall, supported by a 2x4 in the middle of the doorway. The natural unflatness of the plaster worked in my favor though, and I ended up with a plausibly flat wall in the end.
Shout out to Wally's Plaster Magic for filling in the bigger areas, that stuff is really good. A skim coat of joint compound smoothed out the transitions and filled small holes.
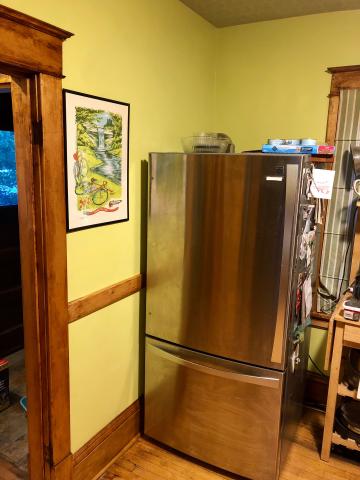
Happily, the kitchen paint was still good, and I had saved all of the trim from the last project to build cabinets, so I had some nice long pieces to use here. I'm happy the way it turned out.
You can't see it in this pic, but the molding pieces go all the way into the corner, like it was always built this way. Everything got scraped and cleaned up then re-shellacked to match the rest of the refinished trim. That board with the signature? It's now the chair rail, ripped to size and refinished.
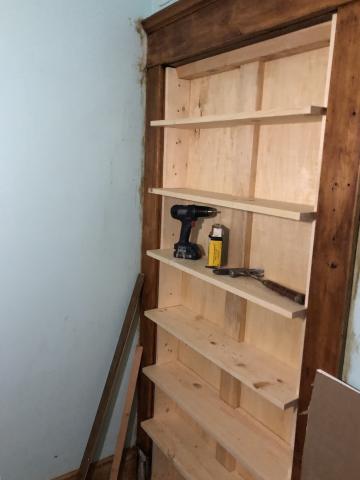
On to the back hall. I knew I wanted to fill the doorway with shelves, because we always need more storage, and it made sense to leave it framed in with that nice trim. Hence, it's a door of shelves.
You can see the plywood and brace here, I didn't want shelf use to crack the newly refinished wall on the other side. Hopefully that's enough.
The side cleats are screwed into place and the shelves are a slip fit in between, so it should be easy to reconfigure if we need to later.
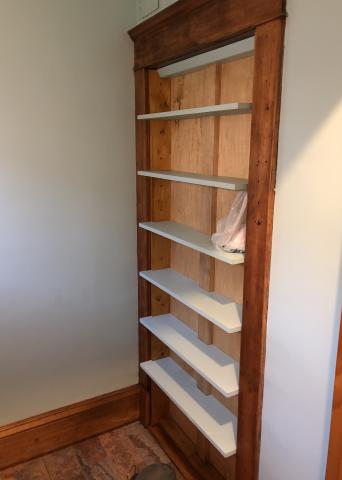
This is the completed view of the shelves from the pantry. The shelves are the same color as the walls (hooray for paint staying useful for 3 years), and the trim shellacked to match the neighboring boards. I just used clear on the plywood back to keep it a lighter color. It's not shown here, but the lower trim all matches the kitchen side, with new pieces quarter round added after this photo. Everything around the floor was also caulked and top finished in polyurethane because it's a winter entry too.
This was a satisfying project because it was minimally disruptive (compared to the other work), and the end result looks like it belongs because it's a lot of the same pieces, just re-arranged.
