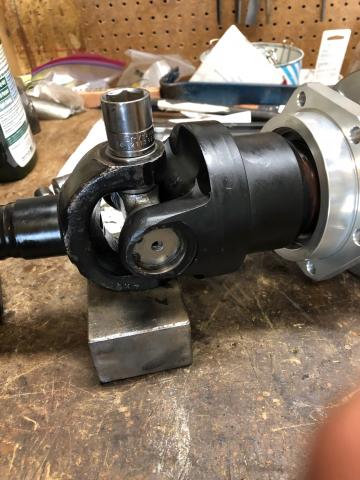
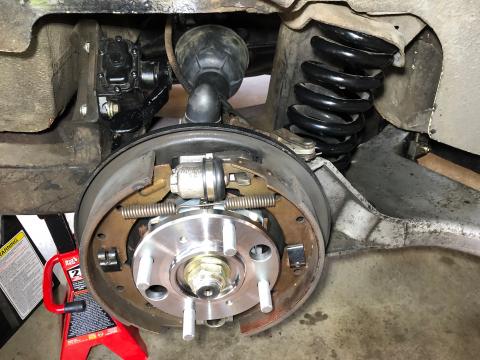
The rear hubs on the TR6 are a known weak point - maybe not always in normal use, but definitely in the racing world, where they commonly used alternate hubs for race-prepped cars. I'll probably never race my car, but the issue has also come up with aging parts, and as i contemplate taking the car on longer weekend trips, and as one of my previously-rebuilt hubs has been loosening up, i opted for the insurance of an uprated set of hubs.
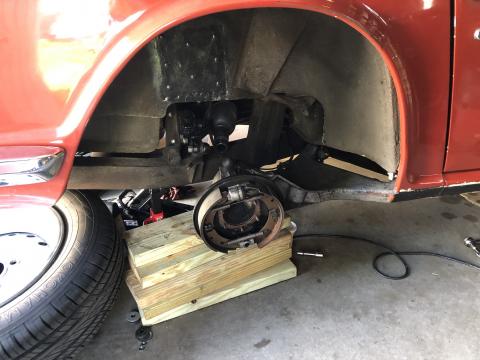
First step: dismantle the rear axles:
I got the new hubs from Richard Good, who makes them with a larger bearing and a stressed area that's almost twice the size of the original hub. I doubt i'll ever really stress these or have to maintain them and they're a lot of peace of mind.
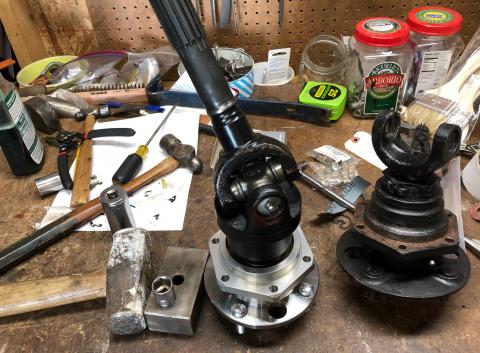
Here's the new hub next to one of the originals:
The flange looks larger on the old one, but that's just because of the angle of the hub and camera. The mounting flange of the new hub seems to be stainless steel, and the whole thing is satisfyingly beefy. It wasn't really necessary, but i decided to paint the yoke area.
I bought a set of good Neapco u-joints in case i needed them, but really planning to use them for the driveshaft later this summer. I was planning to re-use u-joint in the axles, but removing the first one i scattered several needle bearings across the garage floor, so i decided to just put the new ones in there now. The Neapcos are very nice u-joints.
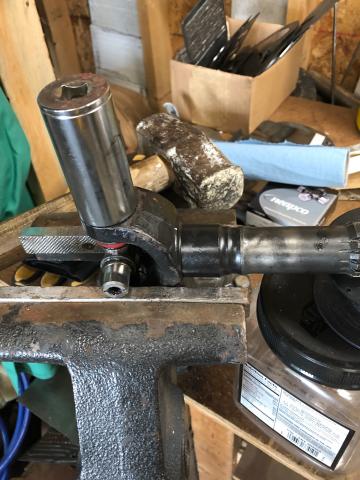
Replacing u-joints is not my favorite job on old cars. It's mostly because i don't do it very often, so every time i have to remember what works best with my tools. For this time, at least, it was easiest to use my large hammer and a socket of the right size to get the u-joint cups out and then back in.
I tapped in the cups to get them started, then pressed them most of the way in the vise. A square dolly block came in handy to do the final tapping home and then i tapped the caps back to relieve the pressure of installation. These notes are mostly for myself.
When i originally installed the polyurethane bushings in the rear swing arms (and all of the suspension, for that matter), i didn't know better and installed them dry. I suspect this is the source of at least some of the noise from the rear end, so i decided to do a full lube job while i had things apart anyway.
I greased the poly bushings in the swing arms, diff mounts, and spring pads, though i'm dubious of that last one. If it quiets some knocking it'll be worth it. I also greased the driveshaft u-joints and the driveshaft splines, all of which haven't been greased as long as i've had the car, and seemed to be pretty dry. I didn't disconnect the driveshaft so i can't confirm that it isn't frozen, but i did shoot a fair amount of grease in there (replacing the plug bolt with a grease fitting).
Everything went back together with no drama, though the driver side trailing arm put up a fight.
This is definitely one of those jobs that's about 60% peace of mind and 40% smoother driving. None of this work is visible, and it didn't fix the slight shimmy at 65mph, but it does seem like the rear end is smoother and quieter. Even the minor clunk when taking off seems quieter, which probably speaks to how dry the driveshaft joints and splines were. Those u-joints will get replaced when the engine is out and exhaust is off anyway, making access much easier.
