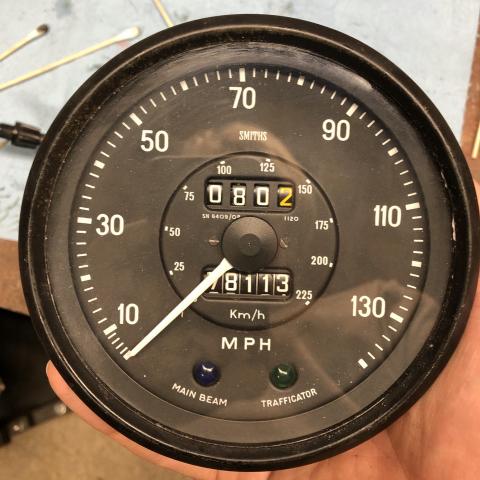
My speedometer was acting up; needle jumping around, making a clicking noise when i backed up, sometimes even staying at 30mph after i'd stopped. One common reason for a twitchy mechanical speedo is a cable that needs fresh grease, but there was no change after a good cleaning and regrease, so it was time to pull it apart.
I've taken all of gauges many times, as part of refinishing the dashboard (and other projects), so that was fine, but opening the speedo felt like trying to fix an expensive small desk clock. I found this reference on repairing Jaeger and Smiths speedometers to be reassuring and helpful along the way.
With the speedo removed, the case bezel twists to align tabs with gaps in the case, then pulls straight off. The first time opening it can be tough, with a dried-up seal. Fortunately, i had mine apart just a couple of years ago and this was the easy part.
To remove the case, remove the 2 screws at the back and push the whole inner assembly out of the case. The needle and face have to come off to access the bearing surfaces that are likely dirty, dry, or otherwise sludged up and not moving right. Before removing the needle, mark the position on the aluminum cup. Hold the large silver cup on the back in one hand, and with the other grab the center of the needle and gently twist it up and off of the small spindle. This is very much like removing the hands from a clock. Two tiny screws hold the dial face on the mechanism, then it just lifts off.
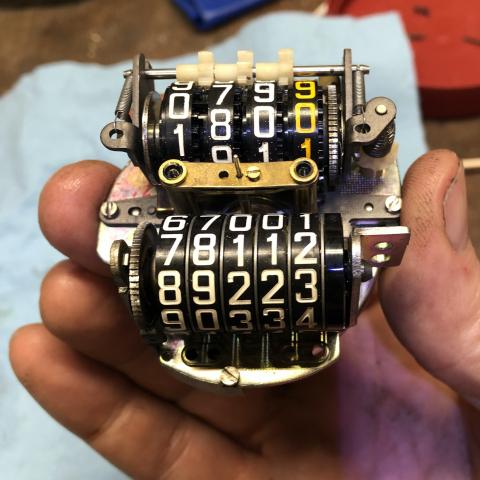
This is what it'll look like under the face. Mine is an early Smiths unit, with an all-metal frame and riveted body. Later units had a plastic frame and increment cogs, and may have the spring above the odomoeters rather than beneath them, but the general workings are all the same.
Top is the trip odometer, bottom is the main odometer. The small pin in the middle is the spindle that holds the indicator needle. With mine, it was obvious that it hadn't been cleaned and regreased in a long time, if ever. The grease was so dry it flaked off into a grit that went everywhere.
I cleaned up the old grease with a small screwdriver and some solvent. You don't want to spray the whole thing with the odometers in place, or you might dissolve the paint used for the numbers.
To get the odometers off, remove the small horizontal springs beneath the toothed gear for each odometer set. A small needle nose pliers or hemostat will come in handy. The screws at the middle left and middle right hold down the trip odometer, plus one other at the top. Remove those 3 screws and life off the trip odometer unit, being careful to retain the post, spring, and cog for the trip reset.
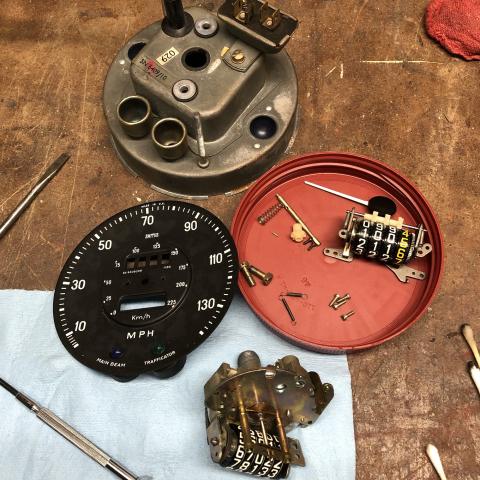
With the trip odometer off, these are the remaining parts:
With the trip unit removed you can see the full needle spindle and the very fine spring that returns the needle to zero at stop.
Remove that last screw from the top, and the main odometer plate will separate from the frame underneath. Be very careful to support the aluminum cup so you don't stress (or break) the spring, which connect the cup to the odometer plate.
The way the speedometer works, the cable input spins a magnet, which creates drag against the aluminum cup that's not mechanically connected to the magnet. The faster the magnet spins, the stronger the pull on the cup, which turns the pointer needle around the scale. A return spring brings it back to zero. The strength of the magnet is calibrated against the pull of the spring to provide the correct value across different speeds.
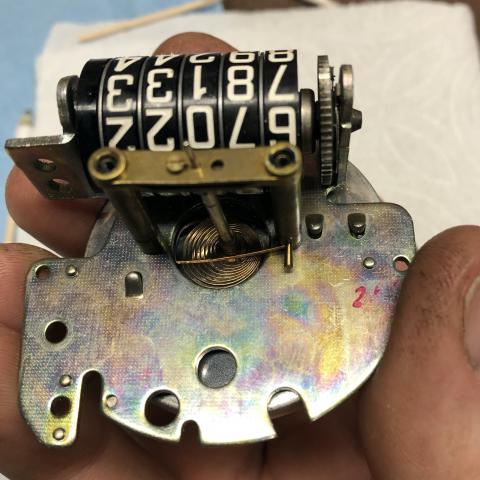
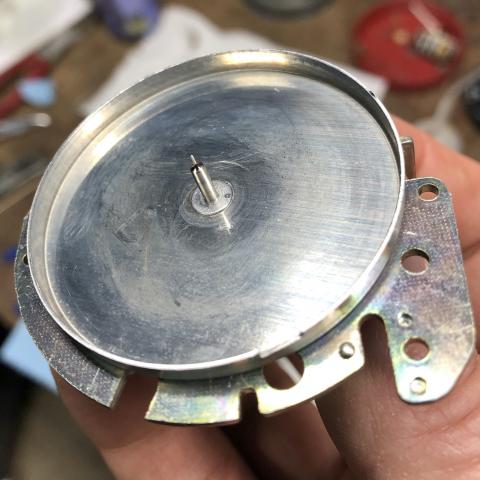
This is the back of the aluminum cup after separating the plate from the frame, you can see the fine-pointed spindle that the cup spins on.
That spindle tip was grimy on the spindle and in the cup that it rides in, that was almost certainly the cause of the stickiness. There's very little tolerance in there for dirt.
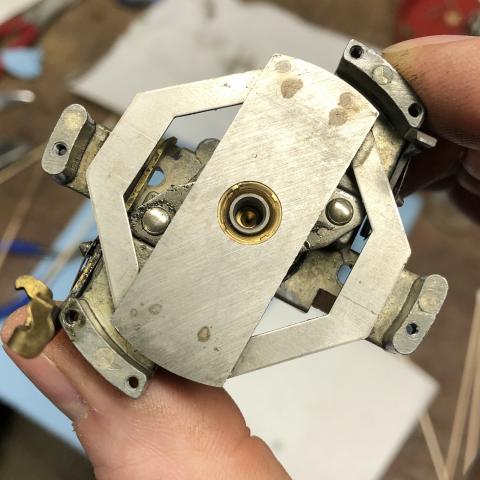
This is the cup side in the magnet. I cleaned this out with some spray electronic cleaner, impossible to reach in there with anything but a fine toothpick. I used some light sewing machine oil on the needle pivots, though super light oil like is used for slot cars (or clocks) might be better. Anything heavier will cause unneeded drag on the cup, and make the needle sluggish.
While it's open, it's a good idea to clean out any other dried grease and make sure all pivots and gears are clean, with fresh lithium grease. A more thorough cleaning might include opening the frame to clean and regrease the cable input, but on my older speedo the frame is riveted together and didn't seem worth opening further. Everything moved pretty smooth once i was done, so i just started to reassemble.
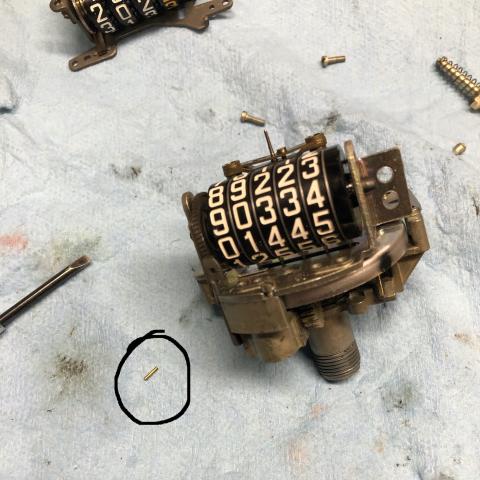
And then i realized this was laying on my workbench:
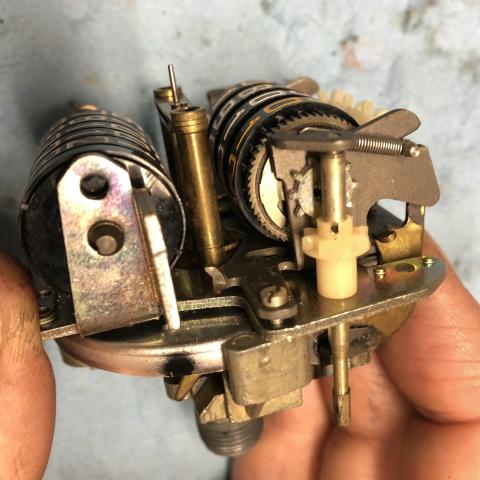
That tiny circled pin drove me nuts. I couldn't figure out where it came from, though it was obviously from the speedo somewhere. Finally i figured it out, it's the retaining pin for the trip reset cog:
You can see the hole at the top of the white cog, that's where the pin goes. This isn't the final assembly, there's a tapered spring that goes on top of that gear.
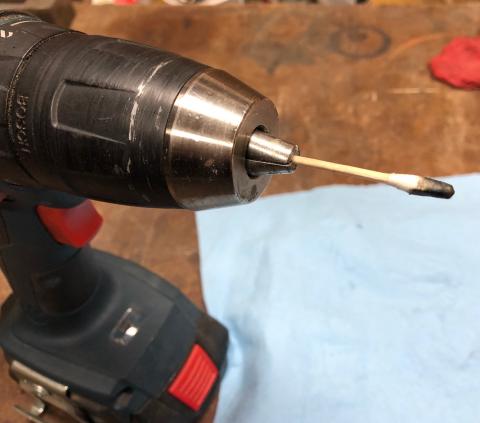
I tested operation by chucking a cotton swab in my drill and running it backwards with the cable input socket. Not very precise, but at least i could see that the needle moved and confirmed that the pivot spun free.
Reassembly is the reverse of before, screw on the gauge face and replace the needle, twisting it down carefully and aligning it with the mark made earlier on the aluminum cup. Reinstall in the case and replace the bezel and it's done. You may need to twist the trip reset cable a bit to get it to seat into the socket.
I was glad to not have to disassemble the odometers any further, or to drill out the frame rivets. These seem like pretty robust units as long as they aren't dropped or too corroded.
There are a couple of ways to adjust the speedo if it's inaccurate. Moving the needle to a different spot on the aluminum cup would adjust the base speed up or down, but won't change the response curve across speeds. If the curve is off, the magnet will have to be made stronger or weaker to fine-tune the strength. The PDF manual above has some tips, and this guy Ed has a good writeup on calibration from his speedo restoration.
