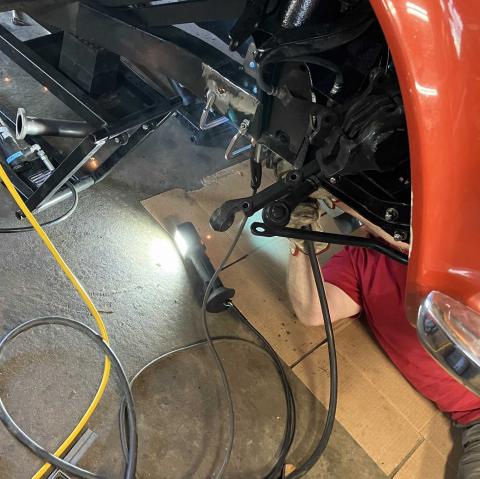
While cleaning up the frame and preparing for the welding work, I decided to take advantage of the generous loan of a Quickjack from a club member to do some other updates.
First, I cleaned up and painted sections of the frame that I hadn't done during the earlier floor pan repairs. I can't fully paint the frame with the body in place, but it's at least more uniform and better protected until I can do a full refurbishment (or frame replacement).
Next, I replaced the differential with a hopefully better used unit. I picked up 2 diffs from a guy who had them left over from a TR6 he owned years ago; one of them is rebuilt but has the 3.45:1 ratio that was used in the UK cars, and the other a standard spec 3.70:1 that just needed new seals. I opted to use the 3.70 diff to keep the same drive ratio. The lower cruising RPM would be nice, but I would be giving up some acceleration, and that's part of what I like about the car. I wasn't able to split the output shafts to replace the side seals, but I installed a new pinion seal (new rubber to replace an original leather seal) and it feels a bit tighter than the diff I pulled out of the car.
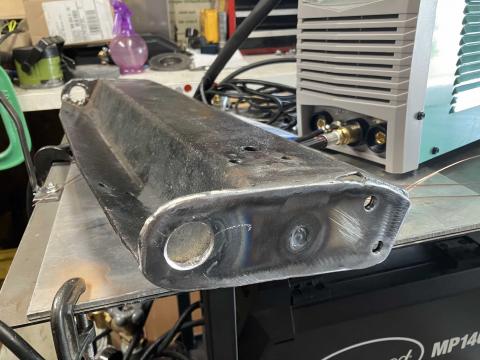
The last update was inspired by having to tow the car home, and I reinforced the tow loops that are part of the radiator protection shield at the front of the frame. I added 1/8" steel plate on either side, slightly more than doubling the thickness of the original metal, and made the holes a bit smaller (though this was in part because I couldn't make them any larger with my step drill).
This is my first repair using my cheap TIG welder, and I'm happy with how it came out. The TIG welds along the edges are solid and clean, needing very little cleanup just to smooth edges. I used the MIG welder around the circle of the loop because it was too hard to get that area clean enough to TIG. That area isn't super clean looking, but it's plenty strong.
Finally, on to the frame repair. I recruited a highly experienced welder from our Triumphs club to do this work so I don't have to worry about my own welds in a safety-related space. Knowing how to weld also means knowing limitations.
I ground out the old weld snot and made sure the new bracket would fit correctly. We needed to replace some missing metal along the top lip of the frame rail where the bracket fits as well as fix areas where the rail had cracked. With the top of the rail repaired we could tack in the new bracket, just above where the clamps are located.
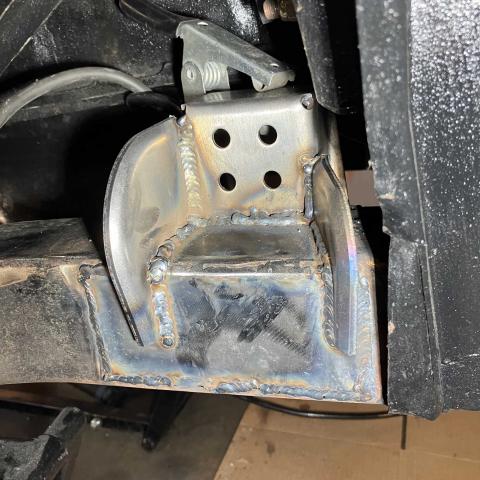
Once we confirmed that measurement, to match the location on the other side, the bracket was fully welded in. Then an extra plate over the outer frame rail where the previous gusset had started puncturing through. This fully resolved the damage to the frame rails and it's at least as strong as original.
After a bit of fine-tuning to the fit we welded in the side gussets, so it's fully up to the standard of the later reinforced frames. The driver-side bracket already had the correct main gusset installed, no idea why that one was done correctly while the passenger bracket was a mess. Anyway, welding all done.
I did a bit of cleanup grinding to make sure the a-arm mount fit correctly in the bracket, then cleaned and painted everything we had welded. After reassembly I did a quick measurement of the front-end toe-in and camber, and both measured within spec, same as it was the last time I aligned it. It test drove just fine too, no pulling or odd sounds, just back to where it should be.
Three days later (after a couple more test drive and re-checking fastener torques) I drove the car 150 miles to the Waumandee hill climb and did several runs up the hill at speed, and everything held together perfectly.


